

Trying to figure out how to make a throw pillow cover? Here is a DIY Throw Pillow Cover idea. It’s just 3 simple steps – take a look!
How to make a Throw Pillow Cover in 3 Easy Steps!
Note from Laurie: I am soooooo crazy excited to share my friend Julie from Less than Perfect Life of Bliss with you! If you haven’t met her before, Julie is my online blog crush . . . every time I visit her site or take a peek at her kitchen table on Instagram I’m inspired to love on my home just a wee bit more.
Take a minute to also see how Julie made the CUTEST EVER mini “naked” cakes this week (seriously . . . GENIUS), and don’t miss her mini boxwood wreath tutorial (I totally want to try this out myself!) Thanks so much Julie for sharing this darling DIY Throw Pillow Cover ~ I can’t wait to fluff up one too!
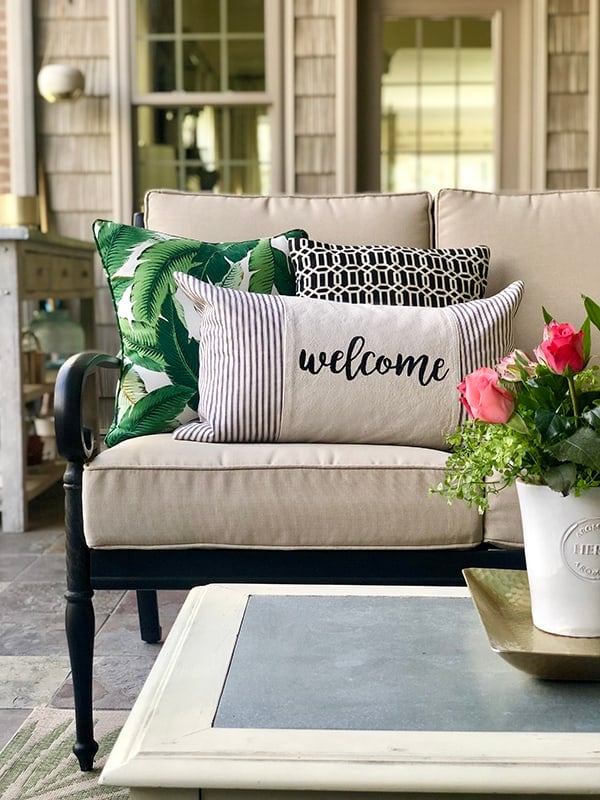
Hello, friends! I’m so happy to be back again sharing another easy and inexpensive DIY project with you! This welcome throw pillow cover I’m sharing today involves one of my favorite techniques ever: freezer paper stenciling!
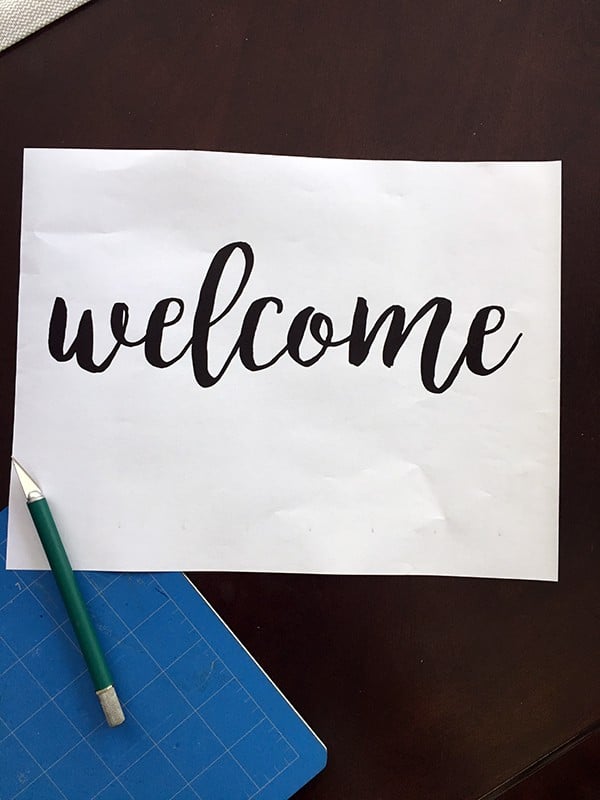
For this particular project, I used a simple welcome stencil, which you can download here, and print to your desired size.
Supplies needed for DIY Throw Pillow Covers:
- freezer paper (this is not the same as parchment paper or wax paper)
- tape
- an Xacto knife
- a cutting mat or cutting board
- a pre-made pillow cover or fabric with which to make your pillow
- an iron
- craft paint and a small paintbrush
Here’s how to get started making this gorgeous pillow:
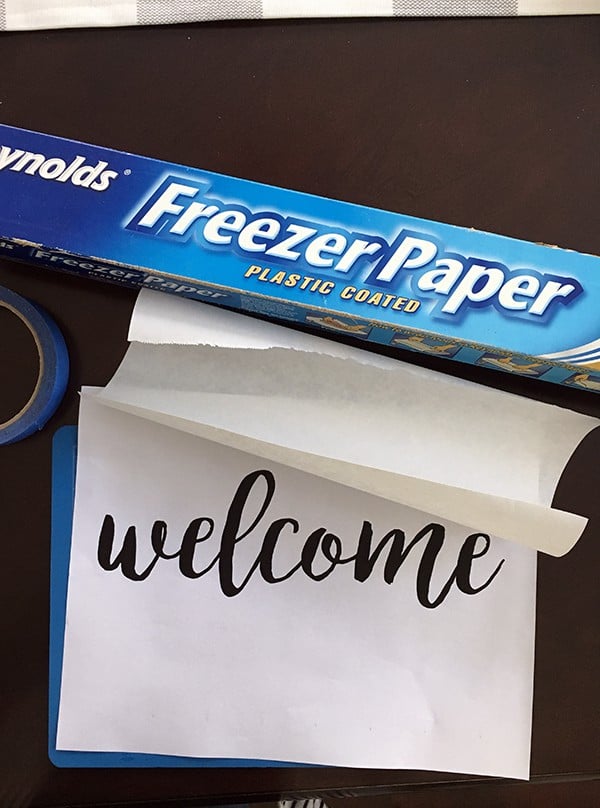
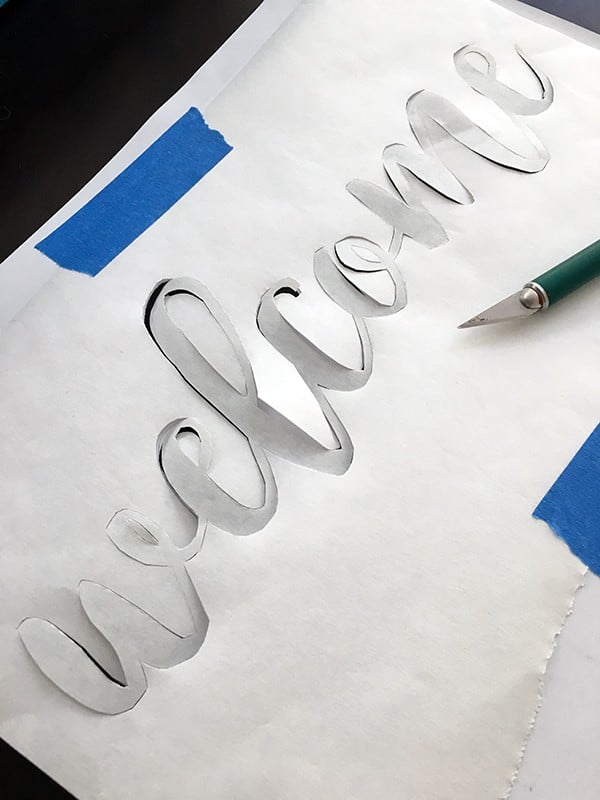
To create the stencil, simply tape your freezer paper (glossy side down) over your pattern to keep it firmly in place.
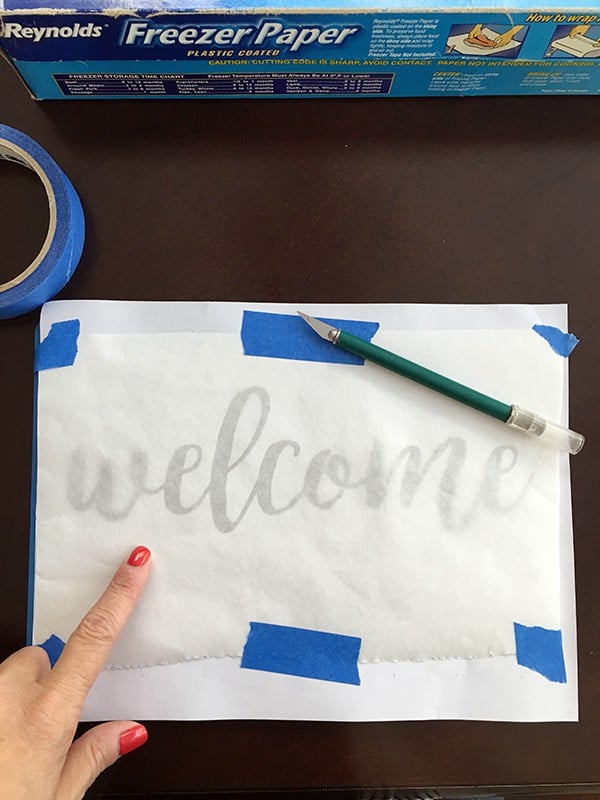
Then, with your surface protected by a cutting mat or cutting board, use an x-acto knife to carefully cut through the freezer paper. Remember, you are making a stencil, so preserve the centers of the letters and all “white space” while cutting.
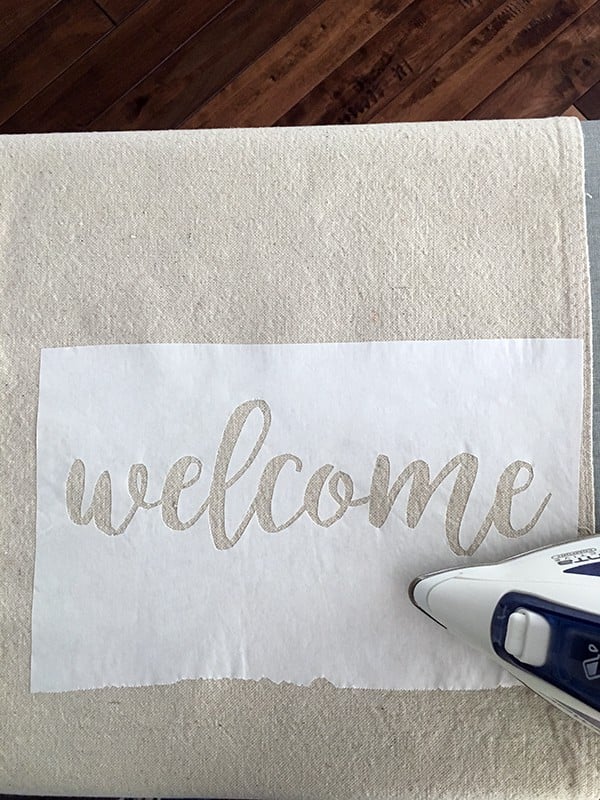
After cutting, you’re ready to position the stencil onto your fabric or pre-made pillow! I used a piece of basic canvas drop cloth to make a simple pillow sleeve for a pillow I already had. If you’d like simple instructions for sewing a zippered pillow cover, see my how-to here!

Once the stencil is in place where you want it, carefully iron over it to adhere it to the fabric. Do not use steam when ironing. And remember to add letter centers you carefully cut before.
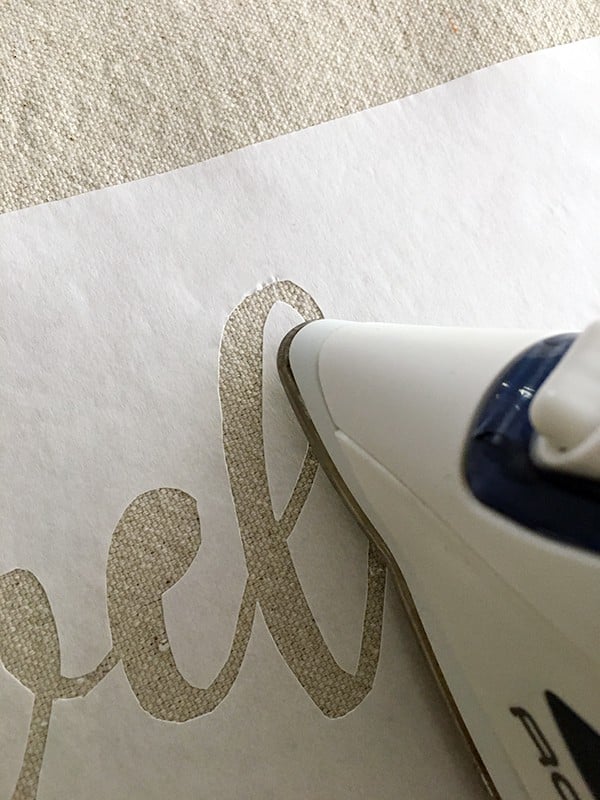
It’s very important to make sure all the edges of the paper have been securely adhered to the fabric.
Next, take a small paintbrush, along with the craft paint of your choice, and gently paint over the stencil! Be careful not to use too much paint so it doesn’t leak underneath the stencil.
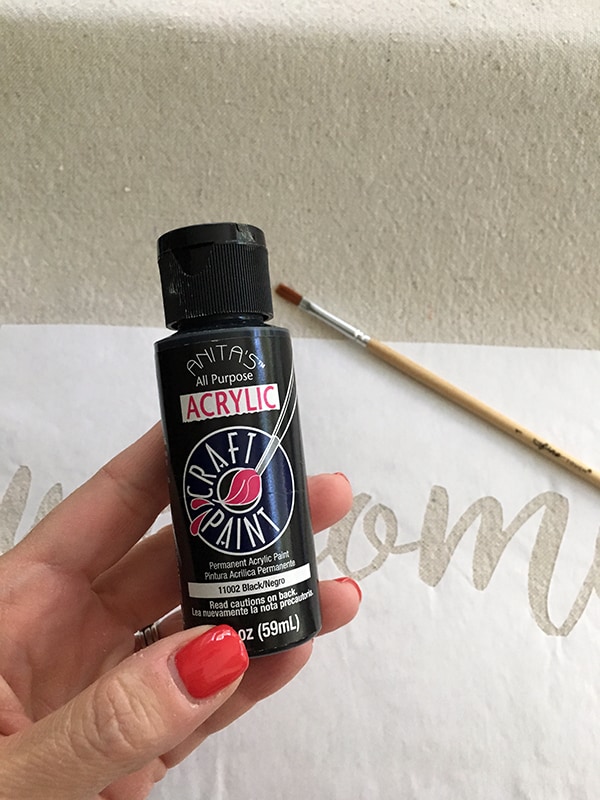
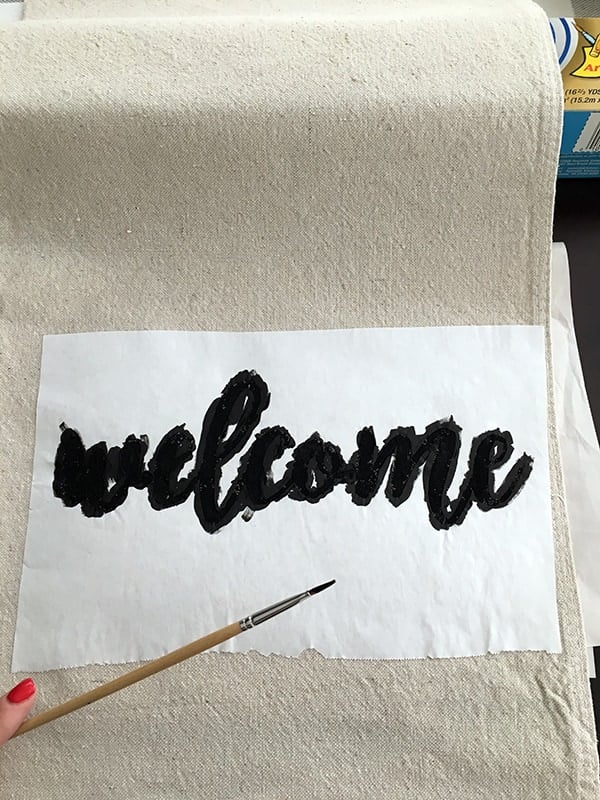
Once that’s done, let it dry, then gently peel off the stencil!

Did I mention how fun this is??

Since I just made a simple pillow sleeve, I just had to sew the ends together and it was done! You could do this using a sewing machine or just by hand since it’s a small area.


How to Make a Throw Pillow Cover
Equipment
- freezer paper (this is not the same as parchment paper or wax paper)
- tape
- Xacto knife
- cutting mat or cutting board
- pre-made pillow cover or fabric with which to make your pillow
- iron
- craft paint and a small paintbrush
Instructions
- To create the stencil, simply tape your freezer paper (glossy side down) over your pattern to keep it firmly in place.Then, with your surface protected by a cutting mat or cutting board, use an x-acto knife to carefully cut through the freezer paper. Remember, you are making a stencil, so preserve the centers of the letters and all 'white space' while cutting.
- After cutting, you're ready to position the stencil onto your fabric or pre-made pillow! I used a piece of basic canvas drop cloth to make a simple pillow sleeve for a pillow I already had. If you'd like simple instructions for sewing a zippered pillow cover, see my how-to here!Once the stencil is in place where you want it, carefully iron over it to adhere it to the fabric. Do not use steam when ironing. And remember to add letter centers you carefully cut before.It's very important to make sure all the edges of the paper have been securely adhered to the fabric.
- Next, take a small paintbrush, along with the craft paint of your choice, and gently paint over the stencil! Be careful not to use too much paint so it doesn't leak underneath the stencil.Once that's done, let it dry, then gently peel off the stencil!Since I just made a simple pillow sleeve, I just had to sew the ends together and it was done!
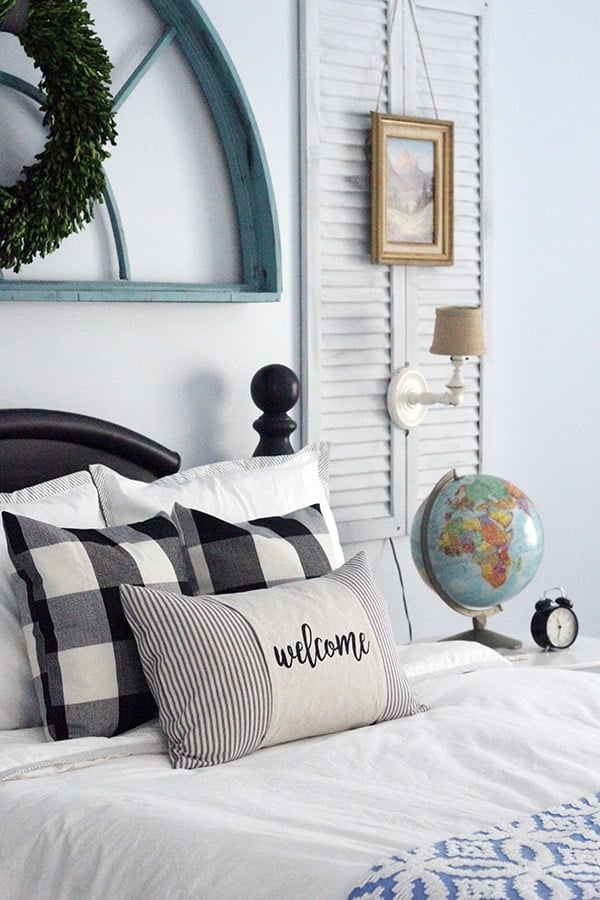
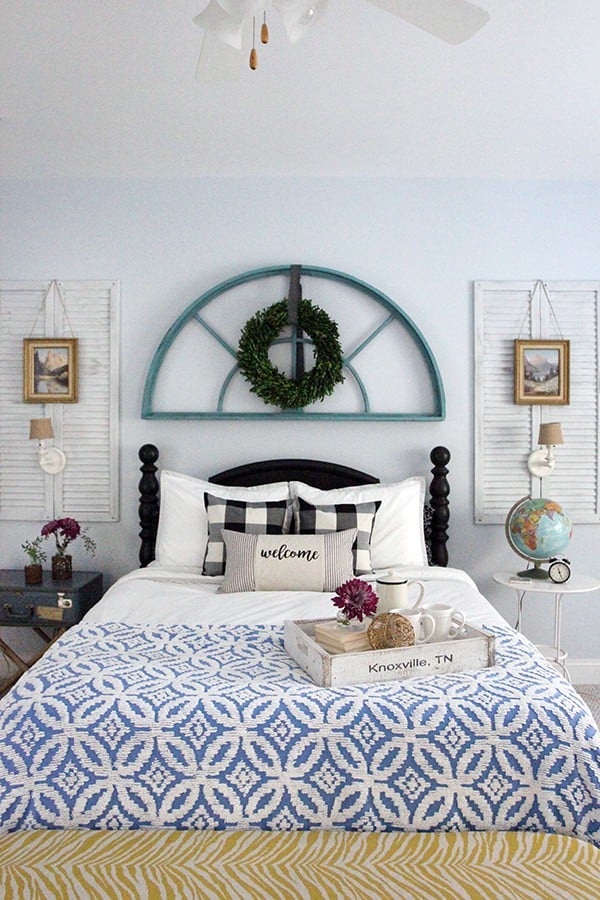
I can’t even begin to count the ways this DIY throw pillow cover can be customized with monograms, words, or other designs! You can place your finished pillow in the living room, bedroom, or even on the porch. Perfect for nearly any home decor!
I hope learning how to make a throw pillow cover inspires you to create a version of this for your own home! Special thanks to Laurie for inviting me to guest post here again today!


Leave a Reply