


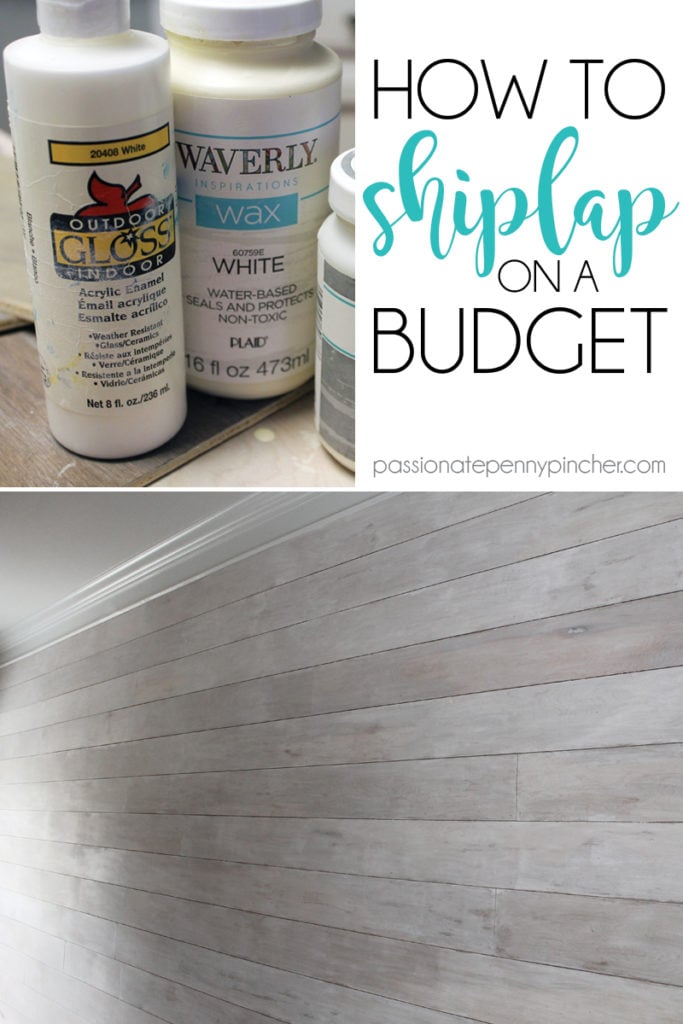
Budget-Friendly Accent Wall Ideas
Bridgett here! I felt like it was time to update my living room with a fresh accent wall. Most accent walls are just painted a different color, but I’ve always wanted to do a shiplap accent wall. Unfortunately, the cost just didn’t seem like it was in our budget. We played around with the idea and decided to do shiplap on a budget. Our decision….PLYWOOD! Who would’ve thought?! We did this wall for under $120 (We had our own paint and tools already) You aren’t going to believe the transformation!

We headed to Lowes and picked up the following supplies:
- Plywood – 4’x8’ 11/32”
- Brad Nailer/Brad Nails
- Level
- Miter Saw/Saw Blade
- Nickels
- Jigsaw/Blade
- Stud Finder
- Spackling
- Spackling Tool/Butter Knife
- Paint Roller
- Paint Tray
- Moulding
Tip: Have Lowe’s cut your plywood for you. It will save SO much time. Sometimes they will charge you per cut but it’s worth it. The guy at our store was so nice and did it for free!

- First thing we did was find the studs with the stud finder and marked them. We then put up the first 4’x8’ board and nailed it to the studs in the wall. (Make sure they are level so you don’t end up with a slanted wall. )
![]()
2. The next board we had to cut a few inches off to make it fit against the wall. Once we had it placed, we used nickels as our spacers. (You can buy spacers but I’m sure you have a few nickels lying around the house.) We used a jigsaw to cut around the plug-ins.

3. It was pretty cut and dry after that. We would do an 8’ board, then one that had been cut. Next we would do one that had been cut, then an 8’ beside it. You want to make sure your seam is staggered.

4. We started painting the walls but the nail holes were a little more noticeable than we had hoped… So we used a color-changing spackling to fill the holes. You can use a spackling tool, but a butter knife works just as well. I even got in on the action here. I couldn’t let the guys have all the fun!
The spackling goes on pink and when it dries turns white. Since they are such small spots, each spot dried pretty quickly. When it all dried, we sanded it down to be flush with the drywall.

5. Once the holes were sanded down and the spackling dust cleaned up, it was time to paint. We chose to paint the wall the same color as the original wall (Alabaster by Sherwin Williams). Shiplap is also gorgeous stained!

6. Lastly, we put a piece of moulding on both sides of the wall. I feel like it kind of made it pop!

All in all, this was a half day project. We saved time by going to Lowe’s the night before and getting all of the supplies we needed. We couldn’t be happier with it and saved so much money at the same time!
Cost Breakdown: Shiplap wall planks are currently $9.98 a piece. It would have taken 30 to do our wall, for a total of $300. We ended up buying 5 pieces of plywood at $23.92 each to do the entire wall, for a total of $120. That’s 60% Savings! And we have some planks leftover to do our bedroom wall. (Shhhh…don’t tell my husband!)

While we were at Lowe’s we grabbed a few things to brighten up the room as well. We found this gorgeous rug for a steal and decided to use the blue as an accent color in the rest of the room.

The blue patio cushion worked perfectly for the bench at the window.

The throws pillows brightened up the room..

and the eucalyptus plant added a fresh Springy touch to the fireplace!
If you want some additional tips on how to do shiplap cheap – my team mate Misty did a project like this and has even more tips to share (The outlet spacers is a good one)
![]()
Or go the ULTIMATE cheap option and make yourself some DIY Sharpie Shiplap!

You might also like this post on How to Paint Wood Paneling...


Very creative and on the cheap on today’s high cost world.
It really is! Bridgett knocked this project out of the park. 🙂