
If you’re looking for how to do shiplap cheap and stay on a budget – here is a DIY tutorial. You’ll love the wax finish we did too!

How to do Shiplap Cheap and On a Budget
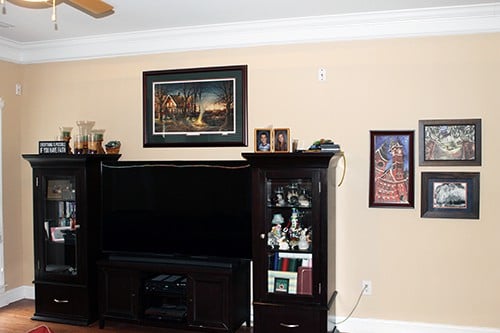
This is a guest post from my friends Misty & Tim, who created this faux shiplap wall in their family room. I LOVE this idea! Here’s a peek at how they transformed their space for under $150.
Let me start by saying that we have lived in our current home for almost 14 years. Two years ago, we changed out our dark kitchen counters for a light granite, and I just loved how much it brightened up the space!
Since then, I’ve been trying to decide how to change up the look of our family room that is open to the kitchen. I’m always slow to make these decisions because I don’t want to get it wrong, then have to do more work to fix it.
I’m a huge fan of home makeover shows, and my favorite (of course!) is Fixer Upper. If you’ve ever seen it, you know all about shiplap!
I finally made up my mind that I wanted to find a way to add the look of shiplap to my room and keep it on a budget I could live with, just in case I ended up hating it. I decided that doing just the one wall behind our entertainment center would be perfect because that’s where everyone is usually looking anyway.
I did a lot of research online for faux shiplap and found a bunch of tutorials and different methods. I kind of combined several different ideas and went with it.
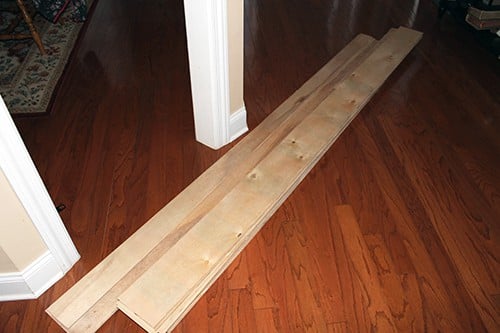
Finding the kind of plywood sheets that I wanted was the first step in the process. Also, I wanted to have the sheets cut into strips at the store to save on time at home. Depending on the store, you may have to pay a small fee for this, but it may be worth it for you.
The main thing to consider about the wood is the thickness. If you have crown molding and/or baseboards, you will want the thickness to match up the best you can. I wanted boards that were about 1/4 inch thick.
How to do Shiplap Cheap:
Measure the area of your wall to determine how many sheets you need, and measure the height of the wall to determine how wide to have the strips cut.
Most likely, your strips will not work out to be a perfect fit from top to bottom. I had the majority of ours cut into 6 1/2 inch strips, but the bottom row was only 5 1/2 inches.
Always put the oddball strip at the bottom because your eye will not be drawn to it as much. I found the perfect wood at my local Home Depot. At the time, I bought 9 sheets at $11.99 each.
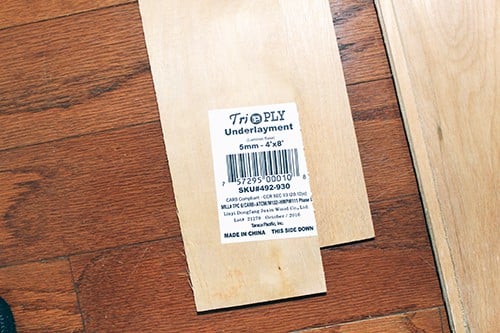
This took us 2 trips because I measured incorrectly & didn’t buy enough the first time. The employees were more than willing the cut the sheets and didn’t even charge for the cuts! Here is a picture of the sticker on the back of the wood.
**Note that prices have gone up quite a bit since this remodel was originally done – but it’s still a fun DIY project to do!**
Besides the wood, the other tools we needed were a nail gun with 1 1/4 inch brad nails, and a saw to cut the boards to length.
We used a circular saw. You can use a hammer and nails if you don’t have a nail gun. We also used a stud finder & level to mark the studs to make sure we nailed into them as much as possible. Some people use an adhesive on the backs of the boards, but we didn’t want to do that.
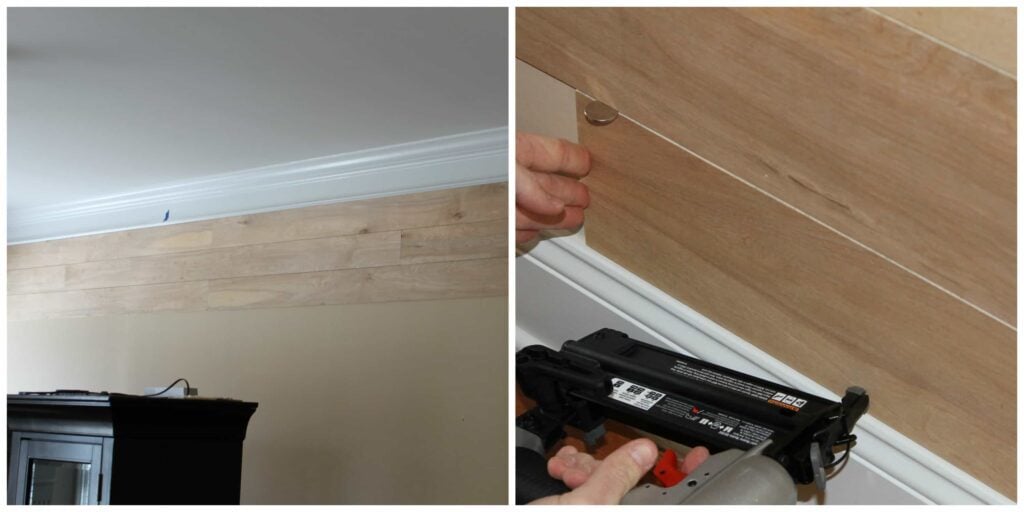
To start the application, we used a full-length strip at the top of the wall just below the crown molding. We used nickels for spacers between each row of boards. When we got to the end of the first row, we needed to make our first cut. As we continued down the wall, we made sure to use cut boards in a staggered pattern so that the seams on each row did not match the seams above or below it.
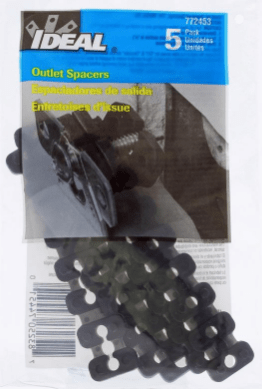
One more thing you need to think about when doing this kind of project is that your outlet plates will not fit with the extra thickness of the wood.
You will need to get outlet spacers. I found these at Home Depot for about $3. They were hard to find in the store, so take a picture with you! You can also order them here.
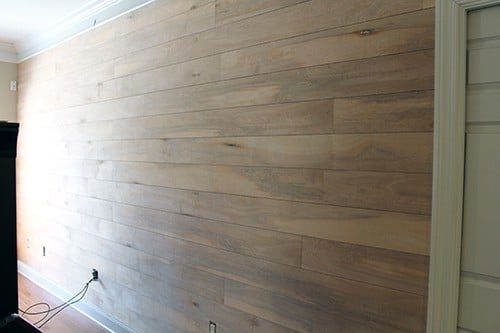
Once the wood was on the wall, the real battle began! My husband and son wanted the keep the wood its natural color. It did have a very nice look, but I really wanted a lighter, whitewashed finish. So I did a few test boards and the boys decided they could live with it:)
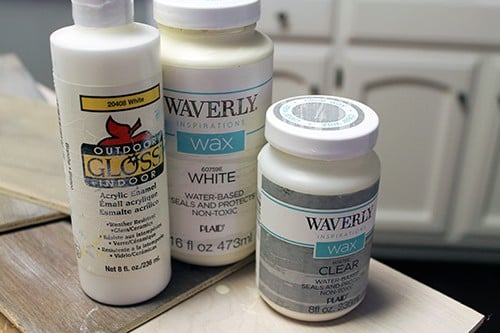
Here are the products I used to create the finish.
I used cheap white craft paint with water for the first layer. Then went over that with this Waverly liquid wax to add a protective coating. I applied all of the layers with a soft cloth. You can get all of these products at Walmart in the craft section. The large wax was about $9, and the smaller was about $5.

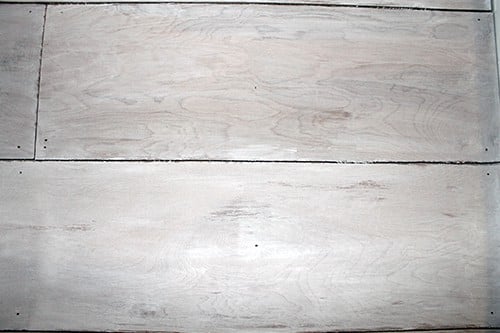
I used a combination of clear & white because my store only had one bottle of white. Here’s a close-up of the finish. I love how it has an aged look, and you can still see the wood grain!
Looking for more home DIY projects? Here are some of our favorites!


Y’all did a great job. Can I get you to do my walls?
I know you can’t but it looks like you could have a second job
Right?! They did an AMAZING job! Send us a picture if you end up trying it in your own home, we would love to see. 🙂
This is beautiful, but sadly that board is now $15 more than what you paid; they are now $26.68 a sheet
I guess I’ll have to go with 1/8” hardboard and just paint them solid white instead of the whitewash look.
Still a beautiful look though.
Oh bummer! I’m betting the solid white will look beautiful too! Send us a pic when you’re done! Would love to see it!
Is the wall still looking good? Are the unfinished edges of the plywood very noticable? The close up picture of the finish makes it seem like they are.
Hi Heather! I just asked my friend Misty who wrote this post and here’s what she said –
“It still looks good! The same as when we did it 🙂 I don’t think the edges are noticeable in a bad way, but I was going for somewhat of a weathered finish. You could add a small strip of trim wood where the corners of the wall are if you prefer. We also did it on a bedroom wall with white paint and it still looks good too!”
Hope that helps! 🙂
Hi Mary.
Some people recommend that you paint the wall the same color as what the shiplap would be, in order to avoid seeing different colors. It doesn’t seem to be an issue with these pictures. Did she paint underneath first?
Thank you for your help.
Jackie
Hi Jackie!
I asked Misty and she said –
“I didn’t paint first. The paint underneath was already a light taupe/tan color. If you had a really bright color, it might show in between.”
Hope that helps! 🙂
When you cut the strips, what was the color of the end of the strips? What did you do to make it less obvious? Can you share a close up picture?
Hi Kathleen! It may depend on what brand you use, but the end of the strip will likely be the color of the back of the strip (you can kind of see it in the picture with the paint bottles in the post). If you can get the ends flush up against the wall, they shouldn’t show very much! 🙂 Hope that helps!
What was your water to paint ratio?
Hi Susan! Not sure of the exact ratio, but it was just a squirt of paint watered down thin to make a light wash on the boards! (You can add more paint until it’s the amount of coverage you like)! 🙂
Do you have to put spacers in? Pros/cons of using them? Do I HAVE to?
Unfortunately Home Depot no longer cuts wood that small.
11” is as small as they will cut!
Good to know Konarider ~ thanks for the heads up! 🙂
Did the same thing in my garage wall and ceiling. Love the look
Was there any color added to the spaces in between. It almost looks like a dark line was added inbetween
Be prepared to cut your own strips because both of our big box home improvement stores wouldn’t do it.
Did you try at a home depot?
I tried our Home Depot and they would do it ☹️
Yep tried a home depot, 2 lowes, & 2 menards neither would do it.
If you will rip the plywood to 7 3/4 inches you will minimize the waste of each sheet. I also use nails as spacers. They can be tapped in to stay in place and then removed.
What do you mean by rip?
Cut, she meant cut.
Looks GREAT!
Rip means cut lengthwise
How do you get the nickel or nail to stay in place?
I believe Charlie used tape to keep them in place Marissa! 🙂 If using the method in the post, you should be able to just hold the nickel in place with the pressure of the board you’re holding (before securing the board). Hope that helps!
Where is a picture of the finished look w/furniture?
Hi Frances! I need to have her take a picture once it’s totally done, it looks so good! 🙂
Any luck getting the after pic with furniture in place?