
If you’re looking for how to create a scalloped nursery wall in your home, check out this DIY tutorial. It’s pretty easy and turns out great!

How To Paint a Scalloped Nursery Wall
Hi there – Laura, here!
Recently, I gave our playroom a makeover. I wanted to breathe new, cute life into the room and make it a fun and inviting space for my girls. I knew I wanted to paint the brown walls that came with the house when we bought it – but how?
Originally, I was going to go with the beautiful board & batten look I have pinned all over my Pinterest. But, with lumber costs where they currently are and low motivation to undertake such a project, I opted to use just paint on the walls. I had seen a scalloped design here and there, but felt it was unique enough to be interesting and cute enough to fit in our playroom.
This design can seem a little intimidating, but was incredibly easy to DIY and the results are so worth the work!
I’m walking you through how to paint a scalloped wall for a nursery in your home!
How to Prep Your Walls to create a Scalloped Nursery Wall
You’ll want to prep your walls the same way you would for any interior painting project. Remove screws and nails, patch, and clean.
Because my current walls were a relatively dark tan, I opted to put a coat of primer on throughout the room.
Tip: We bought an extra long paint roller when we moved and even though it is only 6” longer than regular rollers, it makes a huge difference and saves a ton of time. You’re able to cover way more area with each roll – worth the extra money in my opinion!
Next Step – Pick your Colors!
Did you know there are more shades of white paint than any other color? At least, that’s how it feels when you’re standing at the store trying to choose a shade of white for your walls!
I ended up choosing Iconic White in a satin sheen by Sherwin Williams for the top half of the wall. I chose three samples of blue-green paint to take home and test on my wall. Sampling is so vital because paint looks so different on the wall than it does in the can or on a color swatch!
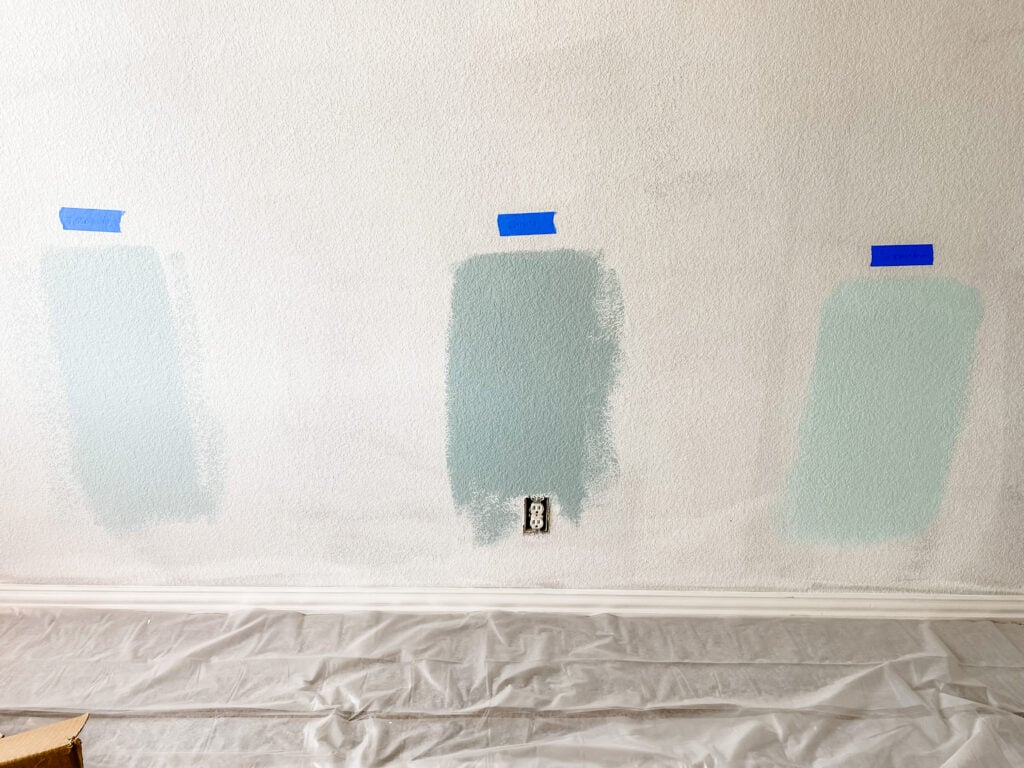
For the scalloped portion, I decided on Racing the Rain by Sherwin Williams, also in a satin sheen. It was the perfect tone I was going for and fit the “not too light but not too dark” description exactly
I learned the hard way in other painting projects to not skimp on the quality of paint. I went with the Signature line of Sherwin Williams paint because they guarantee one-coat coverage. It is noticeably thicker and better than other paint I have used in the past and not having to do a second coat was a relief!
I used my white paint and started from the ceiling, painting as normal until about halfway down the wall. Once the white paint was totally dry, the fun began!
Decide your Scalloped Nursery Wall Design and Start Painting
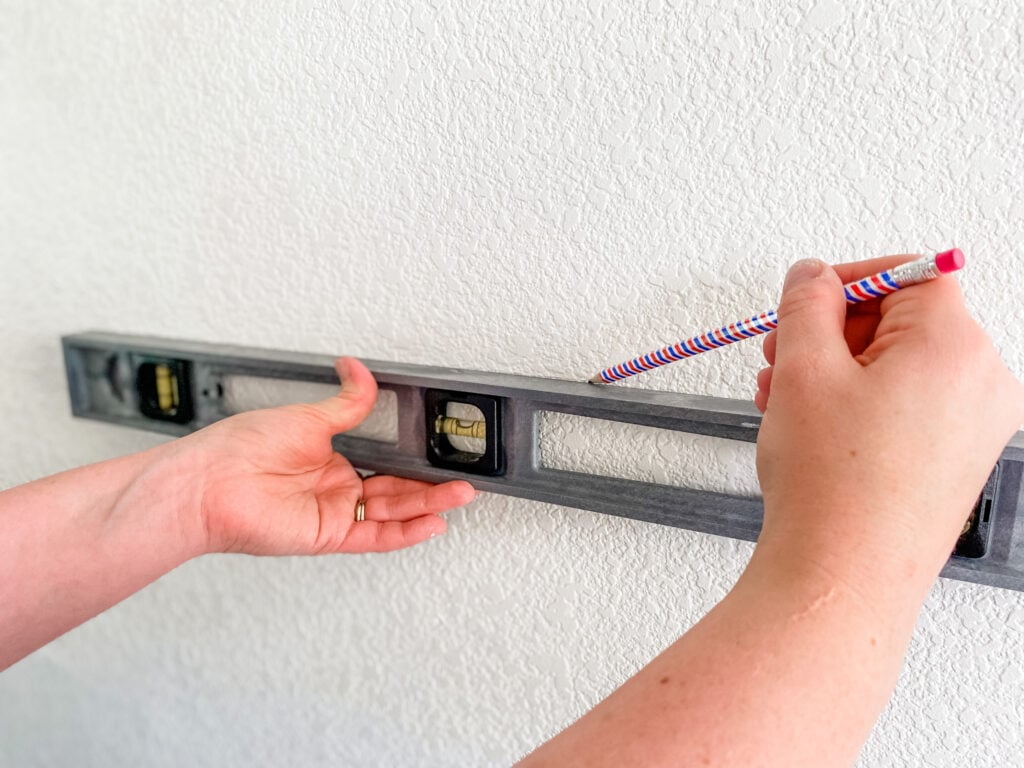
Using a measuring tape and pencil, I measured down from the ceiling 47” (I had eyeballed beforehand about where I wanted my scallops to start) and put small marks across the whole wall, about 12-18” apart. You can choose any height for your scallops to start, just considering the scallops themselves will be another 2-4” above your line.

Once I marked the whole wall, I used my long level and traced an even line connecting each of my marks to ensure everything stayed straight.
Next, I used 2” painter’s tape along the top of my pencil line across the entire room. The painter’s tape enables you to quickly roll the paint on the whole surface without worrying about accidentally painting too high somewhere and ruining your design.
To avoid the paint bleeding under the tape, I also applied a thin line of paintable caulk on the bottom edge of the tape, and spread it in with my finger. This seals the tape to the wall really well, and while technically an optional step of taping I feel it is the best method.

I used a brush on my baseboards first and painted about 1” above the trim. Then, I used my handy extra-long roller and painted the whole room up to the tape.
While the paint is still slightly wet, remove the tape – you want to pull slowly at about a 45° angle away from the wall. You should be left with a nice, crisp line!
Once your bottom half is dry, you can begin tracing your scallop. I used a pasta plate from my dishes to trace my scallop shape! It was easy to hold onto, and did not bend or move against the pencil. Play around with different circles you have in your home to find the right shape and size you’re looking for. I would recommend not using anything that has a lip to it so that you know you’re tracing the exact same shape each time.
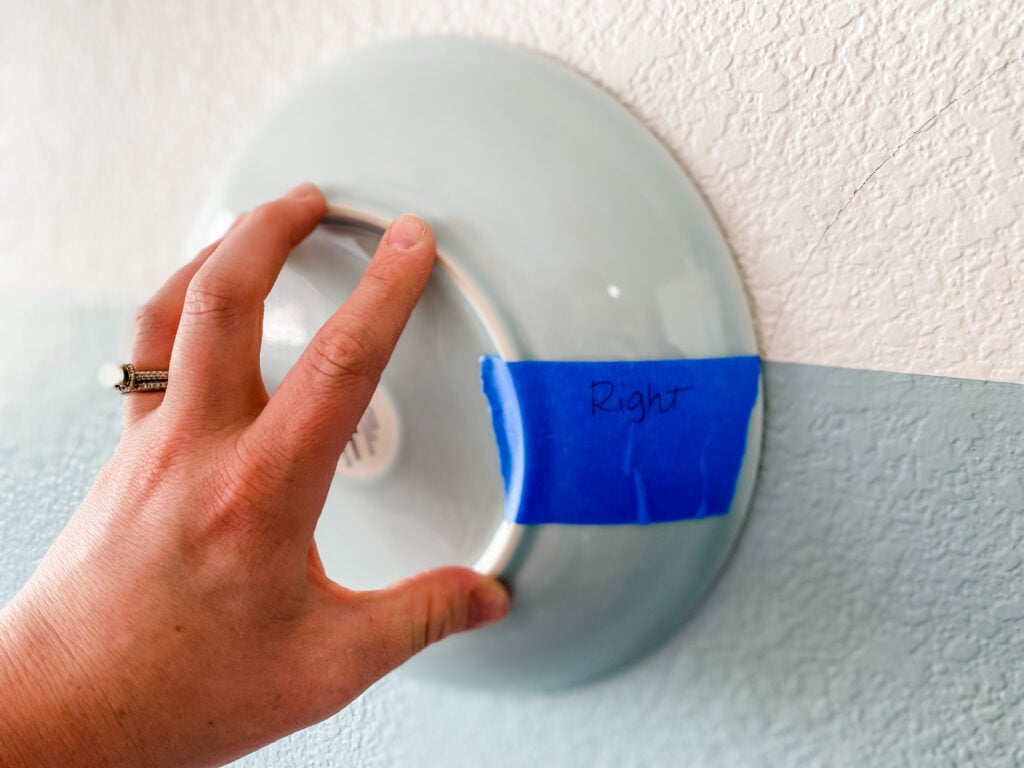
I used painter’s tape to mark where on the plate I needed to line up with the line on the wall. I also indicated the left and right sides so there was absolutely no confusion. I then held the plate up to the wall and started tracing! This part was so stinkin’ quick and easy – I was amazed.

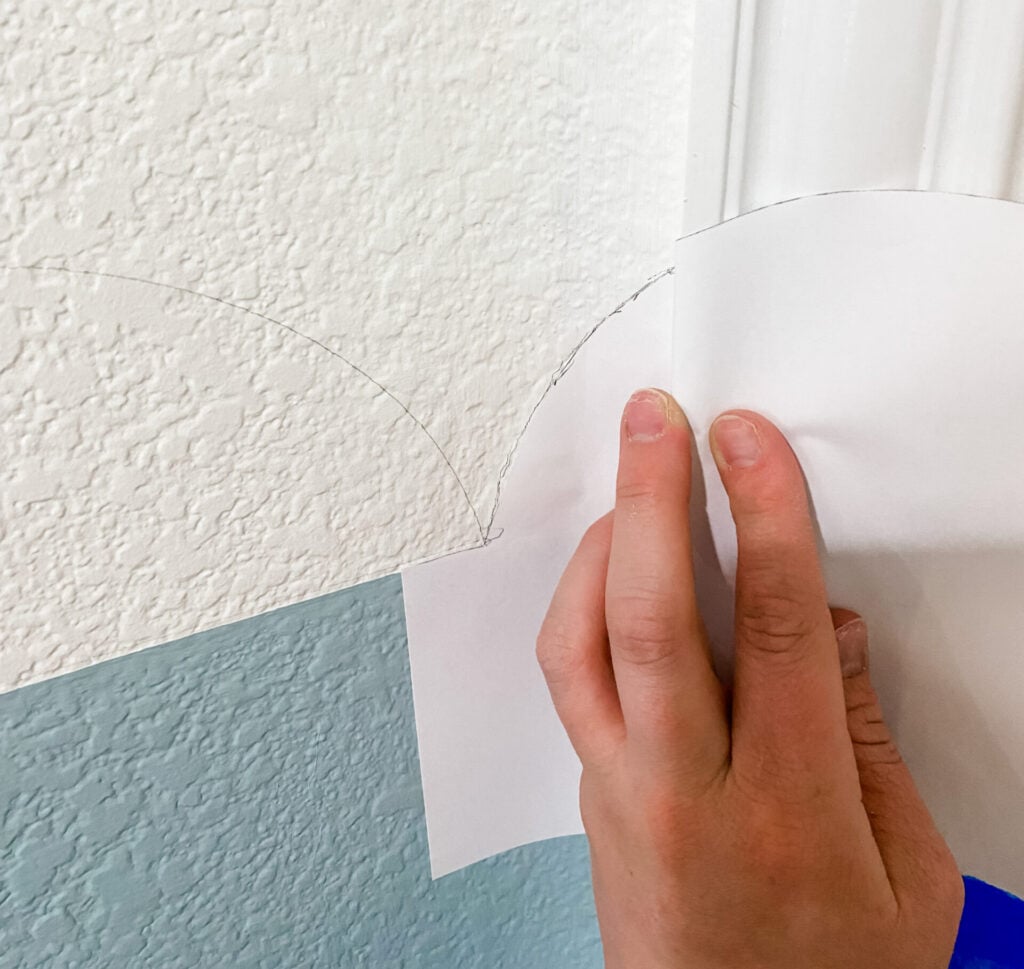
For corners or tough spots, I traced the plate onto a piece of paper and cut it out so that I could fold and bend it as needed to continue the pattern onto the next wall.

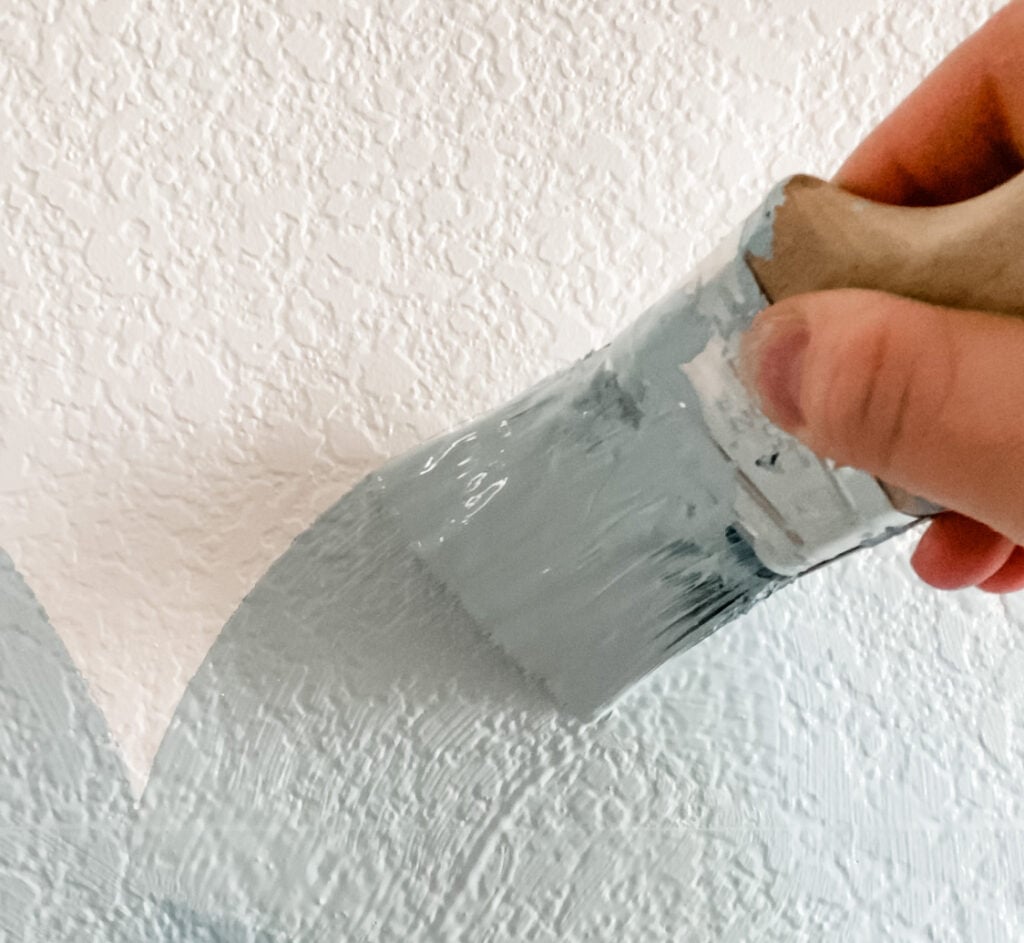
I was able to paint the scallops using an angled interior paintbrush. Going into it, I expected to have to use a small, detail brush for the edges but I found I was able to get a pretty exact line using my large brush so I just used a detail brush for tiny touch up spots.
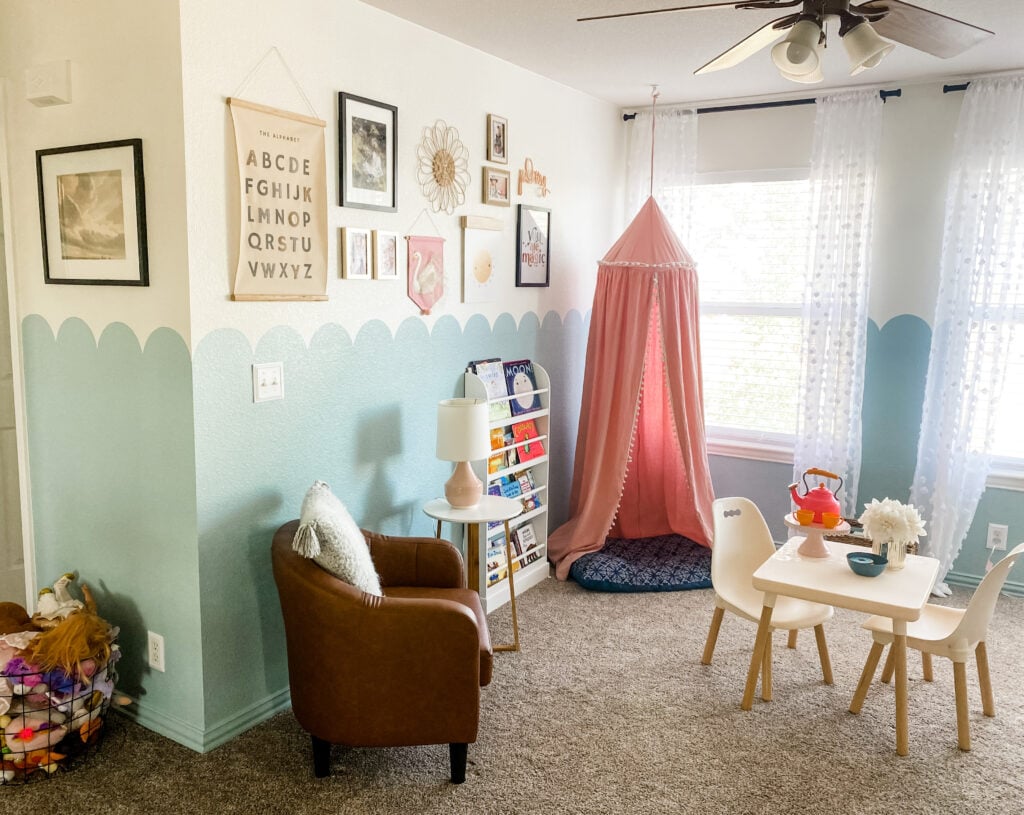
I am in awe of the final product! It was exactly what I envisioned for the space and I’m so glad I went with the scalloped design! It’s the perfect, whimsical look I was going for!

Do you think you’ll try Scalloped Nursery Wall DIY in your home?


That is adorable and you did a great job! I have admired that design all over the internet and am glad it worked for your home.