

Last year, my friend Lilly attempted this craft, but got a little frustrated and put the supplies aside. Fast forward a year.. and she got the supplies out again and decided to try this craft out – but with a couple changes.
With a couple adjustments, and a fresh mind, it took her around 5 minutes per pumpkin!
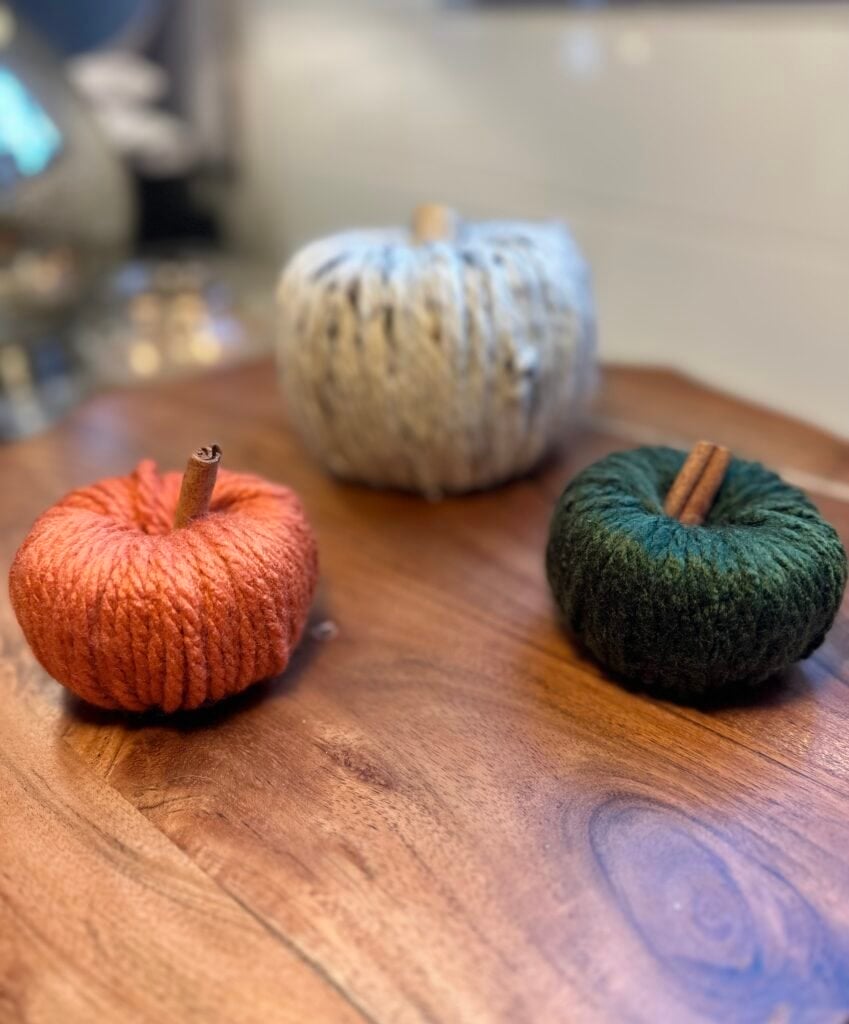
Here’s how to make these Yarn Pumpkins:
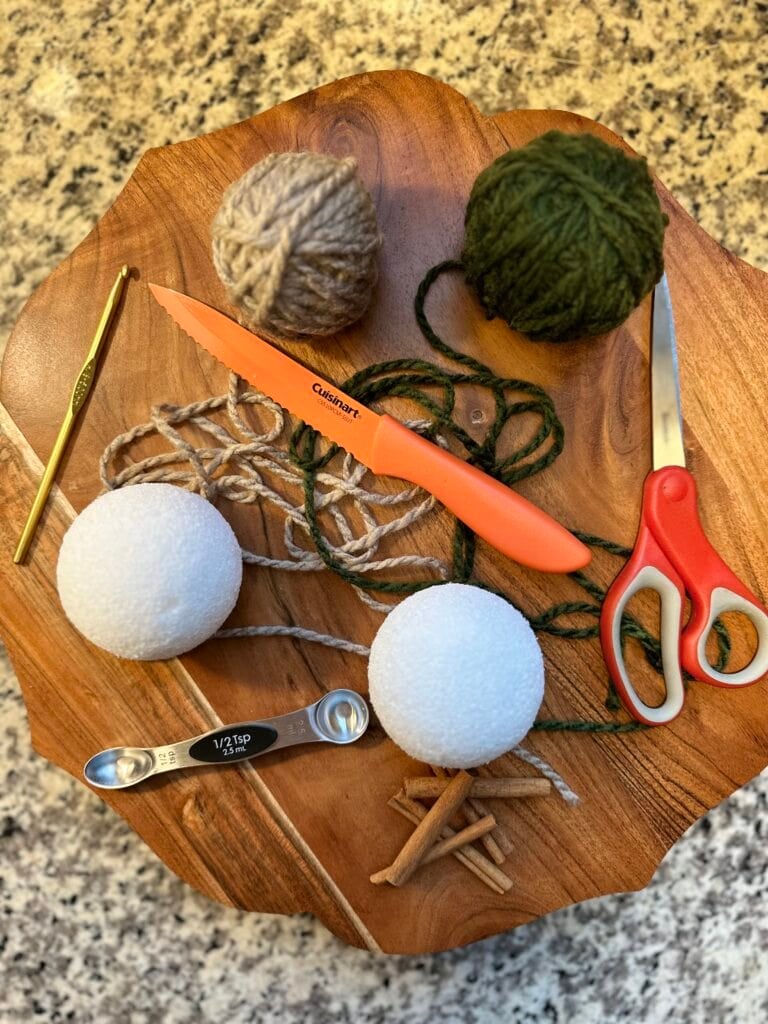
Supplies:
- Fall colored yarn (I used the Bernat Softee Chunky Super Bulky 6 weight) **Check the Dollar Tree for yarn too!**
- Serrated Knife (I used this Cuisinart serrated knife)
- Styrofoam Ball (I used the 2.8in size)
- Scissors
- Crochet hook or yarn needle (really this could be optional)
- Cinnamon Sticks (HIGHLY recommend getting cinnamon sticks in bulk from Amazon they’re just so great to have around this time of year and you just don’t get enough for the price at grocery stores in my opinion)
- 1/2 tsp
Okay so now that we’ve got our supplies all collected this is what you’ll want to do –

STEP 1 – Cut off sides of styrofoam balls
- Start with your styrofoam ball and knife. you’ll cut off two sides directly across from each other ~ I took about 1/2in off on both ends

STEP 2 – Scoop out the center of the ball using your spoon
- TIP
- Do NOT skimp on hollowing out the center – trust me- this is what started my frustration last year because I didn’t trust the yarn would cover a massive hole. BUT you can cover this up easily when you’re about 3/4’s way done in STEP 3.

3 – Okay now set aside the styrofoam ball for a second, and take a couple yards worth of yarn. Fold your yarn in half once, and then again. Take the end of the end of the yarn with cut pieces and place inside the hole (you’ll want the looped sides when you need to attach your next strand of yarn). Now you’ll just continuously loop the yarn through and around the styrofoam. When you run out of yarn, just cut off another piece and attach to the yarn already on the styrofoam and continue looping it through until you’ve covered all of the styrofoam.
- TIPS
- If you feel like the center is still too big still when you’re about 3/4’s the way done, start weaving the yarn in a figure eight, so you’ll wrap the yarn around one side, stick the yarn through the hole, and bring it through and out the opposite side you just covered and just continue that til you’re done.
- To connect the two pieces of yarn, loop the two cut sides through the loops already on the styrofoam and pull through and loop back through the looped end of the new piece and pull tight
- When you’re about close to being done instead of using your fingers to feed the yarn through it might be easier to start using your hook
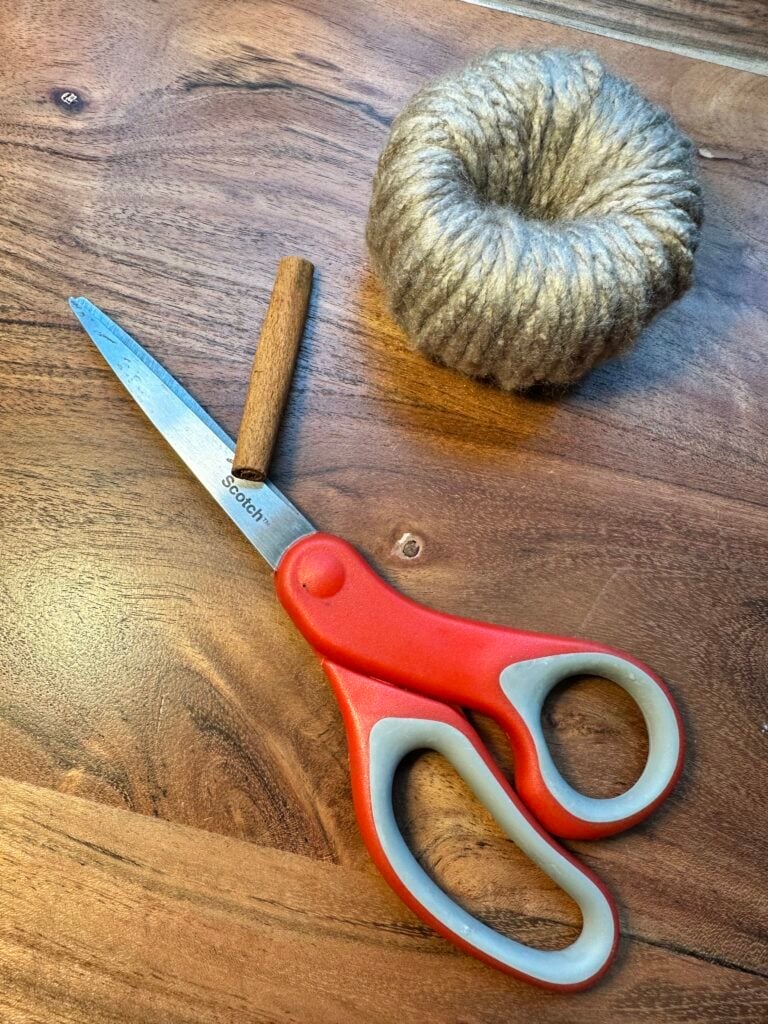
STEP 4 – Cut the cinnamon stick in half and place one inside.
- TIP
- You CAN hot glue your cinnamon stick if you’d like. I just chose not to because I wanted the option to replace mine every year to keep them smelling fresh. I would suggest putting the glue on the end of the cinnamon stick and attaching that way instead of directly putting glue to the yarn.
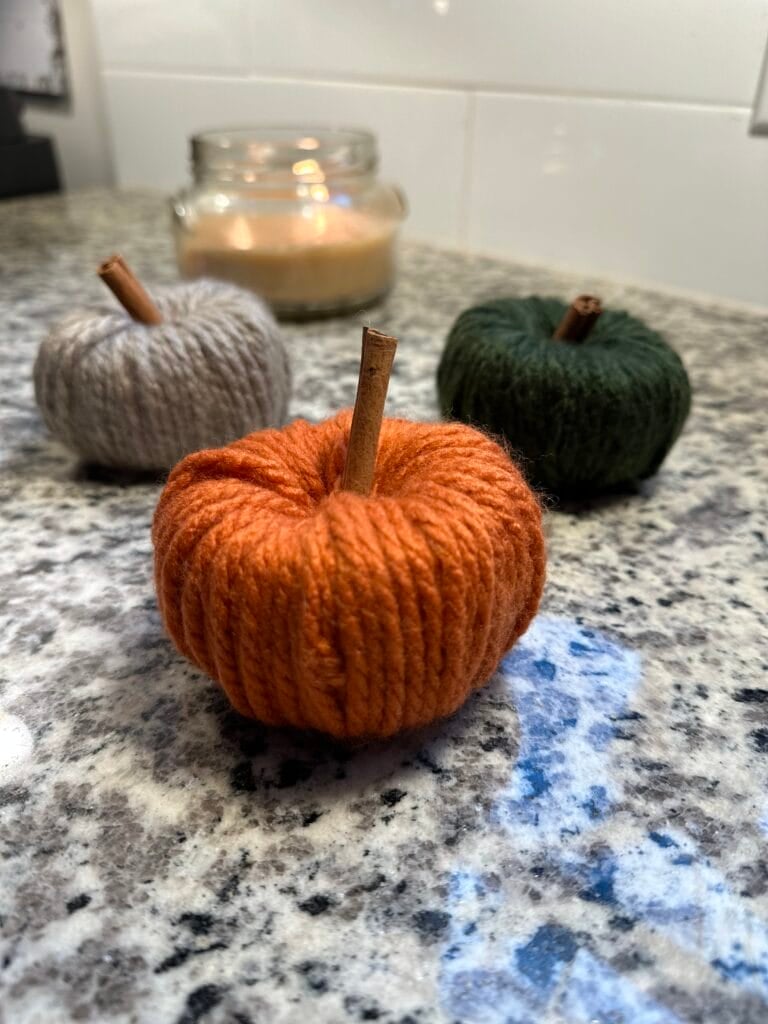
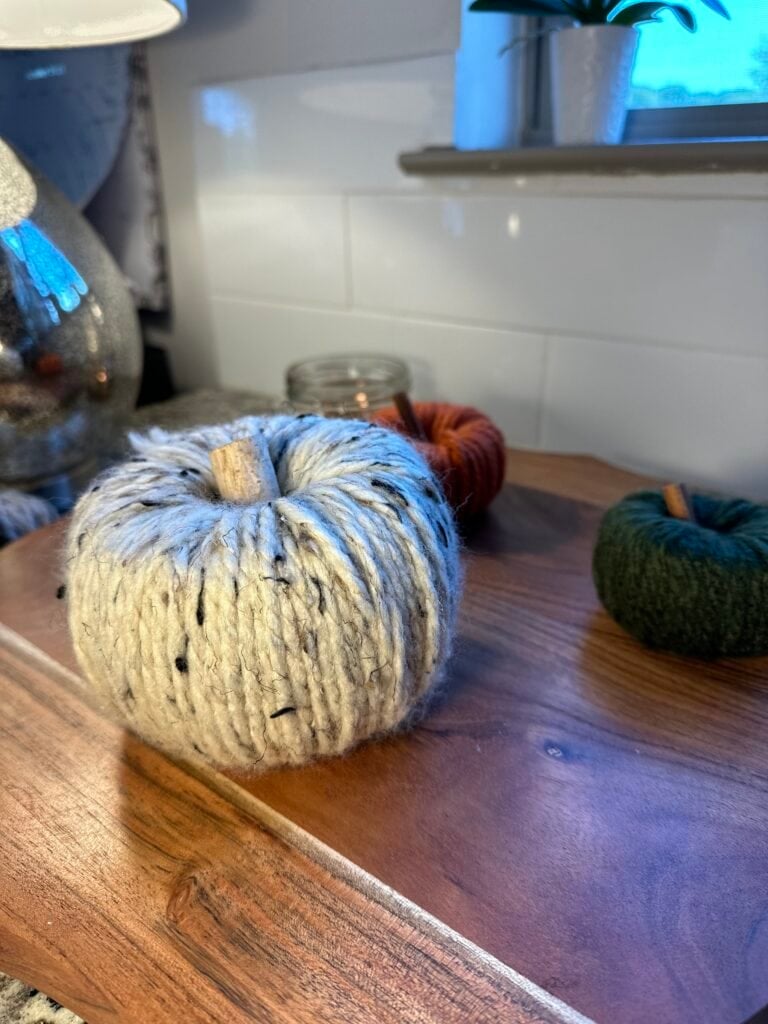
I ended up doing a larger pumpkin too but the cinnamon stick looked just a smidge too small for it so I used one of the Wood Stems from DollarTree that I had leftover from this Christmas Tree Craft we did last year.
If you end up doing this craft, I’d love it if you’d to share your results with me! Just remember to have fun with it – crafting is meant to be fun!


Leave a Reply