
These DIY Christmas Stocking Letters are an easy way to personalize your family’s stockings this year. I’ll show you how to make them!
DIY Christmas Stocking Letters
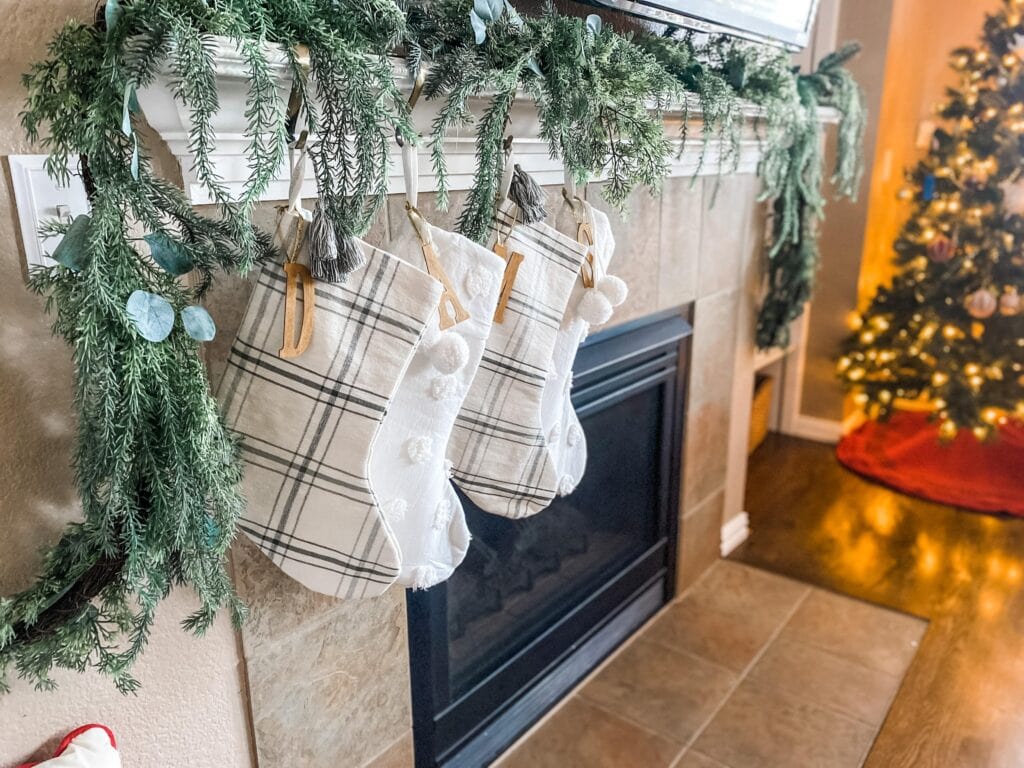
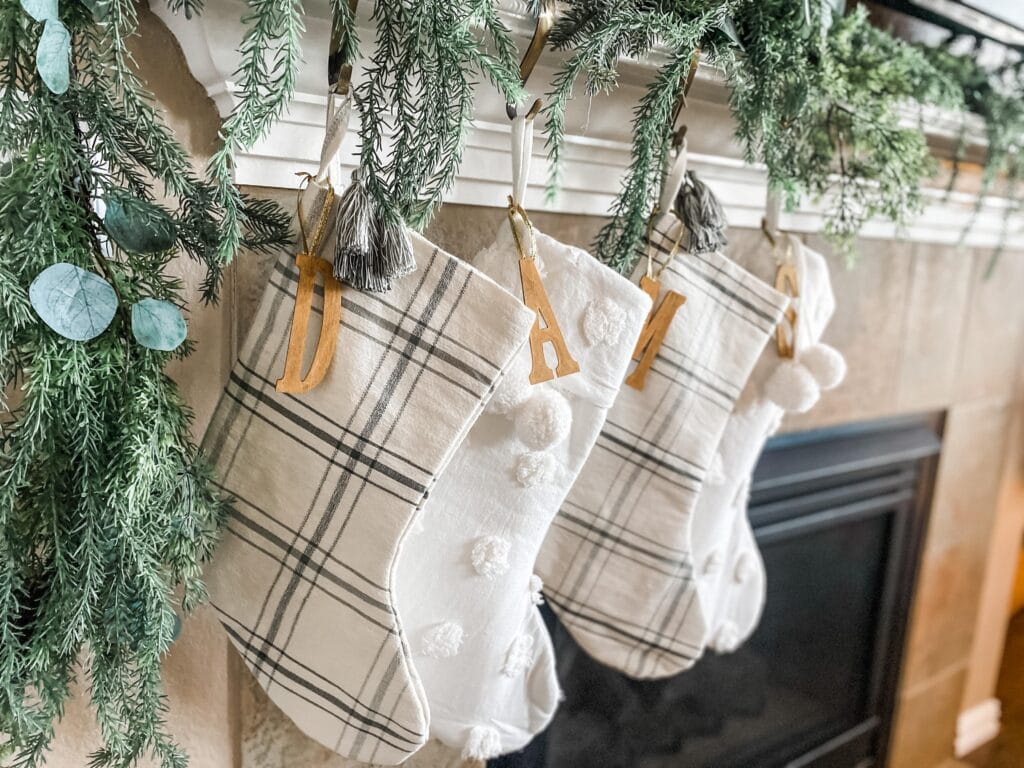
This year, I took advantage of some sales and got new stockings for my family. They’re so pretty and pull in the greens I’m loving in my décor this season. But, I needed a way to personalize them to each family member without ordering expensive tags or embroidery. I found a way to do just that – DIY stocking letters! I spent less than $10 on this project for four stockings and I am so pleased with the result.
Here’s how I did it:
Supplies needed for DIY Stocking Letters
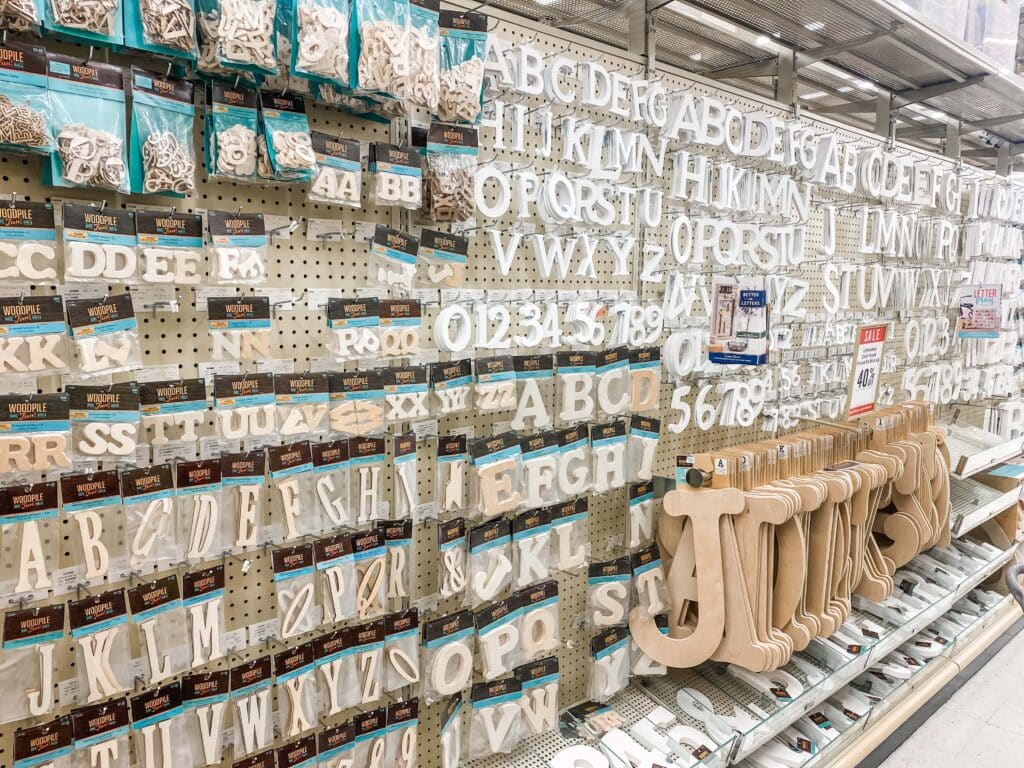
Gather supplies to make your stocking letters. I got everything I needed with a quick trip to Hobby Lobby. You’ll need:
- Small, wooden accent letters (you can see in the picture above that most craft stores like Hobby Lobby, Michaels, and JoAnn have a pretty wide selection of letters to choose from, so you can pick your style)
- Acrylic paint OR wood stain depending on the color and look you want
- Decorative ribbon or twine
- Hot glue gun
- *Optional – power drill with a small drill bit*

How to make a DIY Stocking Letter
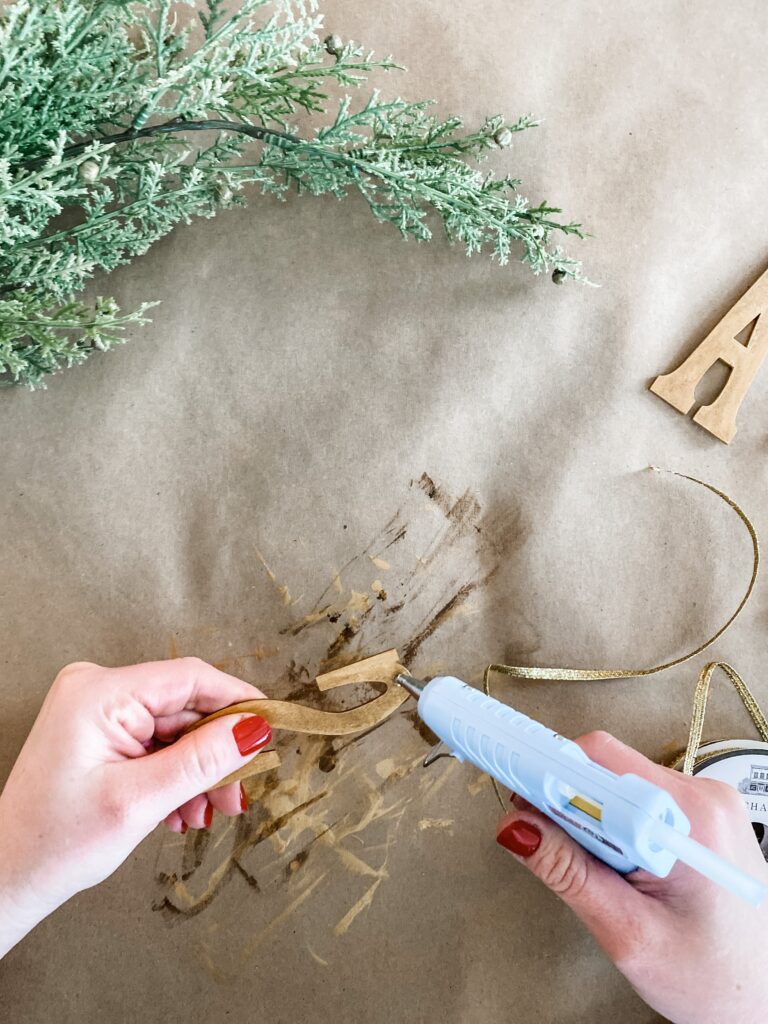
I have a lot of antique gold sprinkled in throughout my Christmas décor, so I wanted this look for my stocking letters as well. I used an acrylic paint and then added some dark wax on top. Alternatively, you could use any color paint or choose a wood stain to keep the wood-look of the letter.
- Paint the front, back, and side of all of your letters and let dry.
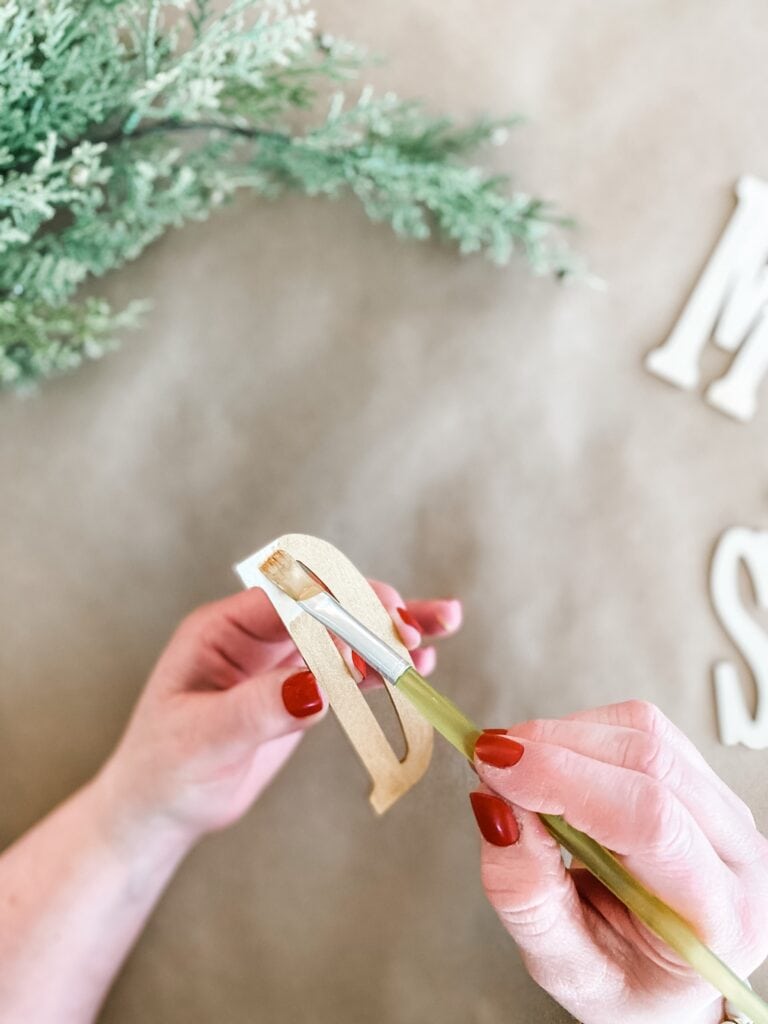
- To get the antique look, I painted a small amount of wax on the letter and immediately rubbed/wiped it off with a dry paper towel. (When you paint with the dark wax, you will for a moment panic that you’ve ruined your letter. Don’t worry – just have your paper towel handy and wipe away and you’ll see that fun, antique look appear!)
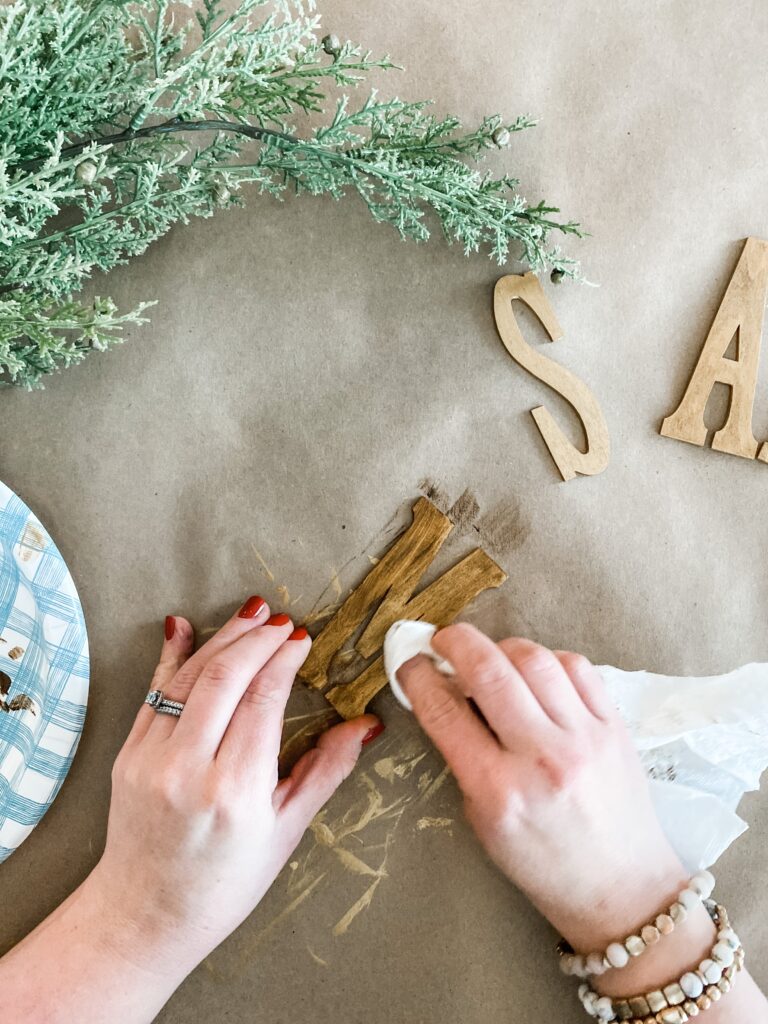

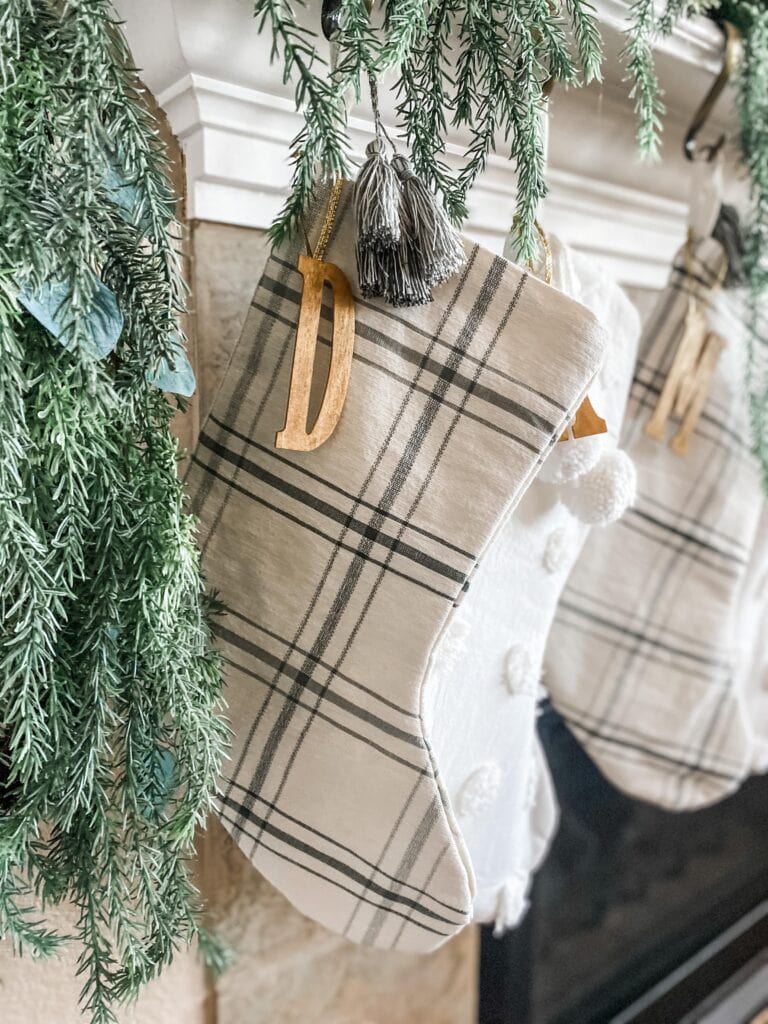
With wax (left) and without wax (right) - Attach your ribbon to the back of the letter using hot glue. Give yourself extra length on both ends of the ribbon to decide how high you want your letter to hang. I knew I didn’t want ribbon hanging down so I cut them short – but I’ve seen some really cute photos online with bows and long ribbon tails. Pick the style you like!
- Tie the ribbon on the loop of your stocking and step back to admire your work!
- **Optional change** – instead of using hot glue to attach the ribbon, you can use a small drill bit to drill a hole through the letter and thread the ribbon through the hole. I would recommend drilling the hole before you paint or stain, and just use caution as my particular letters were very thin and I was worried they might just snap if I drilled so I skipped it.
P.S. – here’s the info for my stockings and mantle décor!
Green Plaid Stockings | Raised Dot Stockings | Pine & Eucalyptus Garland | Antique Gold Stocking Holders
There you have it! Beautiful, personalized stockings on a budget! Will you try this DIY for your stockings?
Time to stuff those stockings! We rounded up 101 Cheap Stocking Stuffer Ideas here!


Leave a Reply