
How to Make a Balloon Arch (Easy DIY Party Decor Tutorial)
Want to make your party pop—literally?? This easy DIY balloon arch tutorial shows you exactly how to create a stunning balloon arch frame using simple supplies (no helium or crazy tools needed!). Whether you’re planning a graduation party, birthday, shower, or backyard celebration, this step by step guide will help you wow your guests with an amazing backdrop.
What You’ll Need to Make a Balloon Arch
- Balloon Arch Kits
- Latex balloons (multiple sizes)
- Balloon decorating strip
- Balloon pump or air compressor
- Command hooks or PVC frame (optional)
- Glue dots for extra hold (optional)
Here are the simple steps I used for this DIY (saving myself a bundle ~ purchasing a pre-made arch would cost $150 or more!). For less than $40 we made this arch in under a few hours, and my daughter was thrilled with the results.
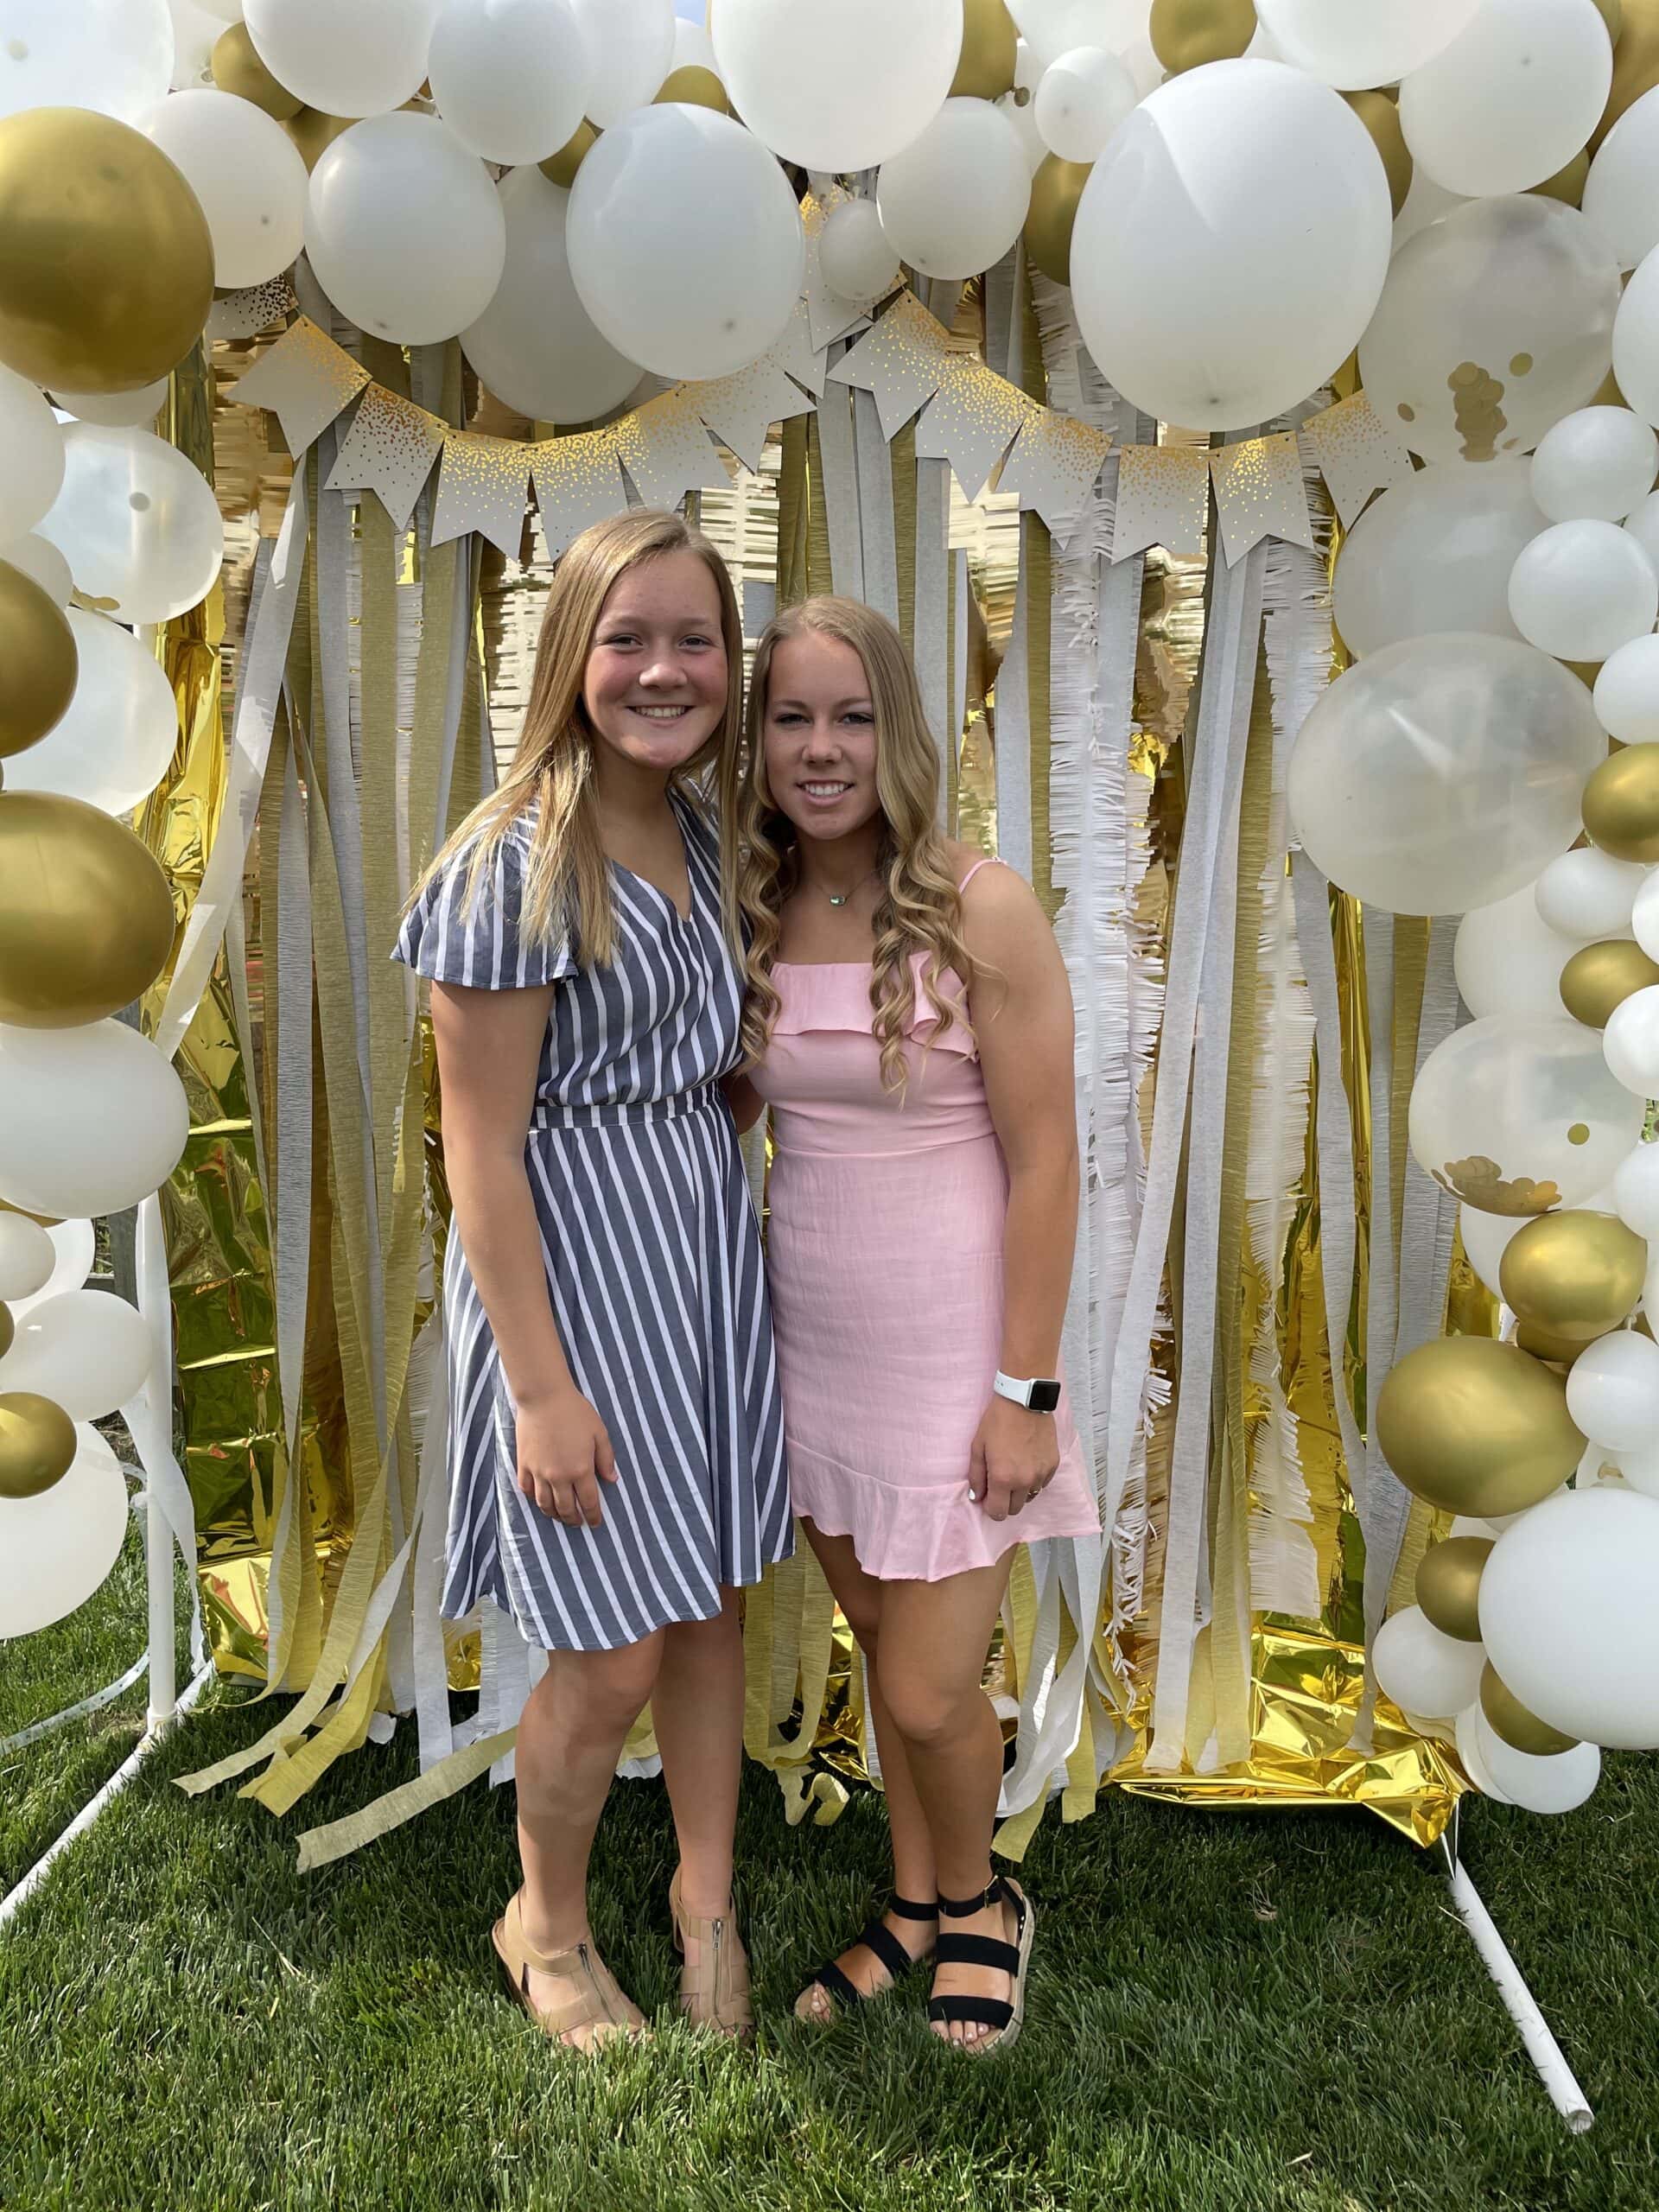
I’ve always wondered how to make a balloon arch after seeing so many pictures on Instagram and Facebook. They are the perfect decor for making a big impact at a graduation, birthday party, baby shower or bridal shower. Your arch can be the focal point of all the decorations – and it makes for great photos of the event as well.
So, when we hosted my daughter’s graduation party at home, I was determined to try out this little DIY project! I’ve seen several balloon arch kits online, but I went with one of these simple kits. Looking for even more party ideas? Check out these fun Graduation Party Hacks and Graduation Gift Ideas!
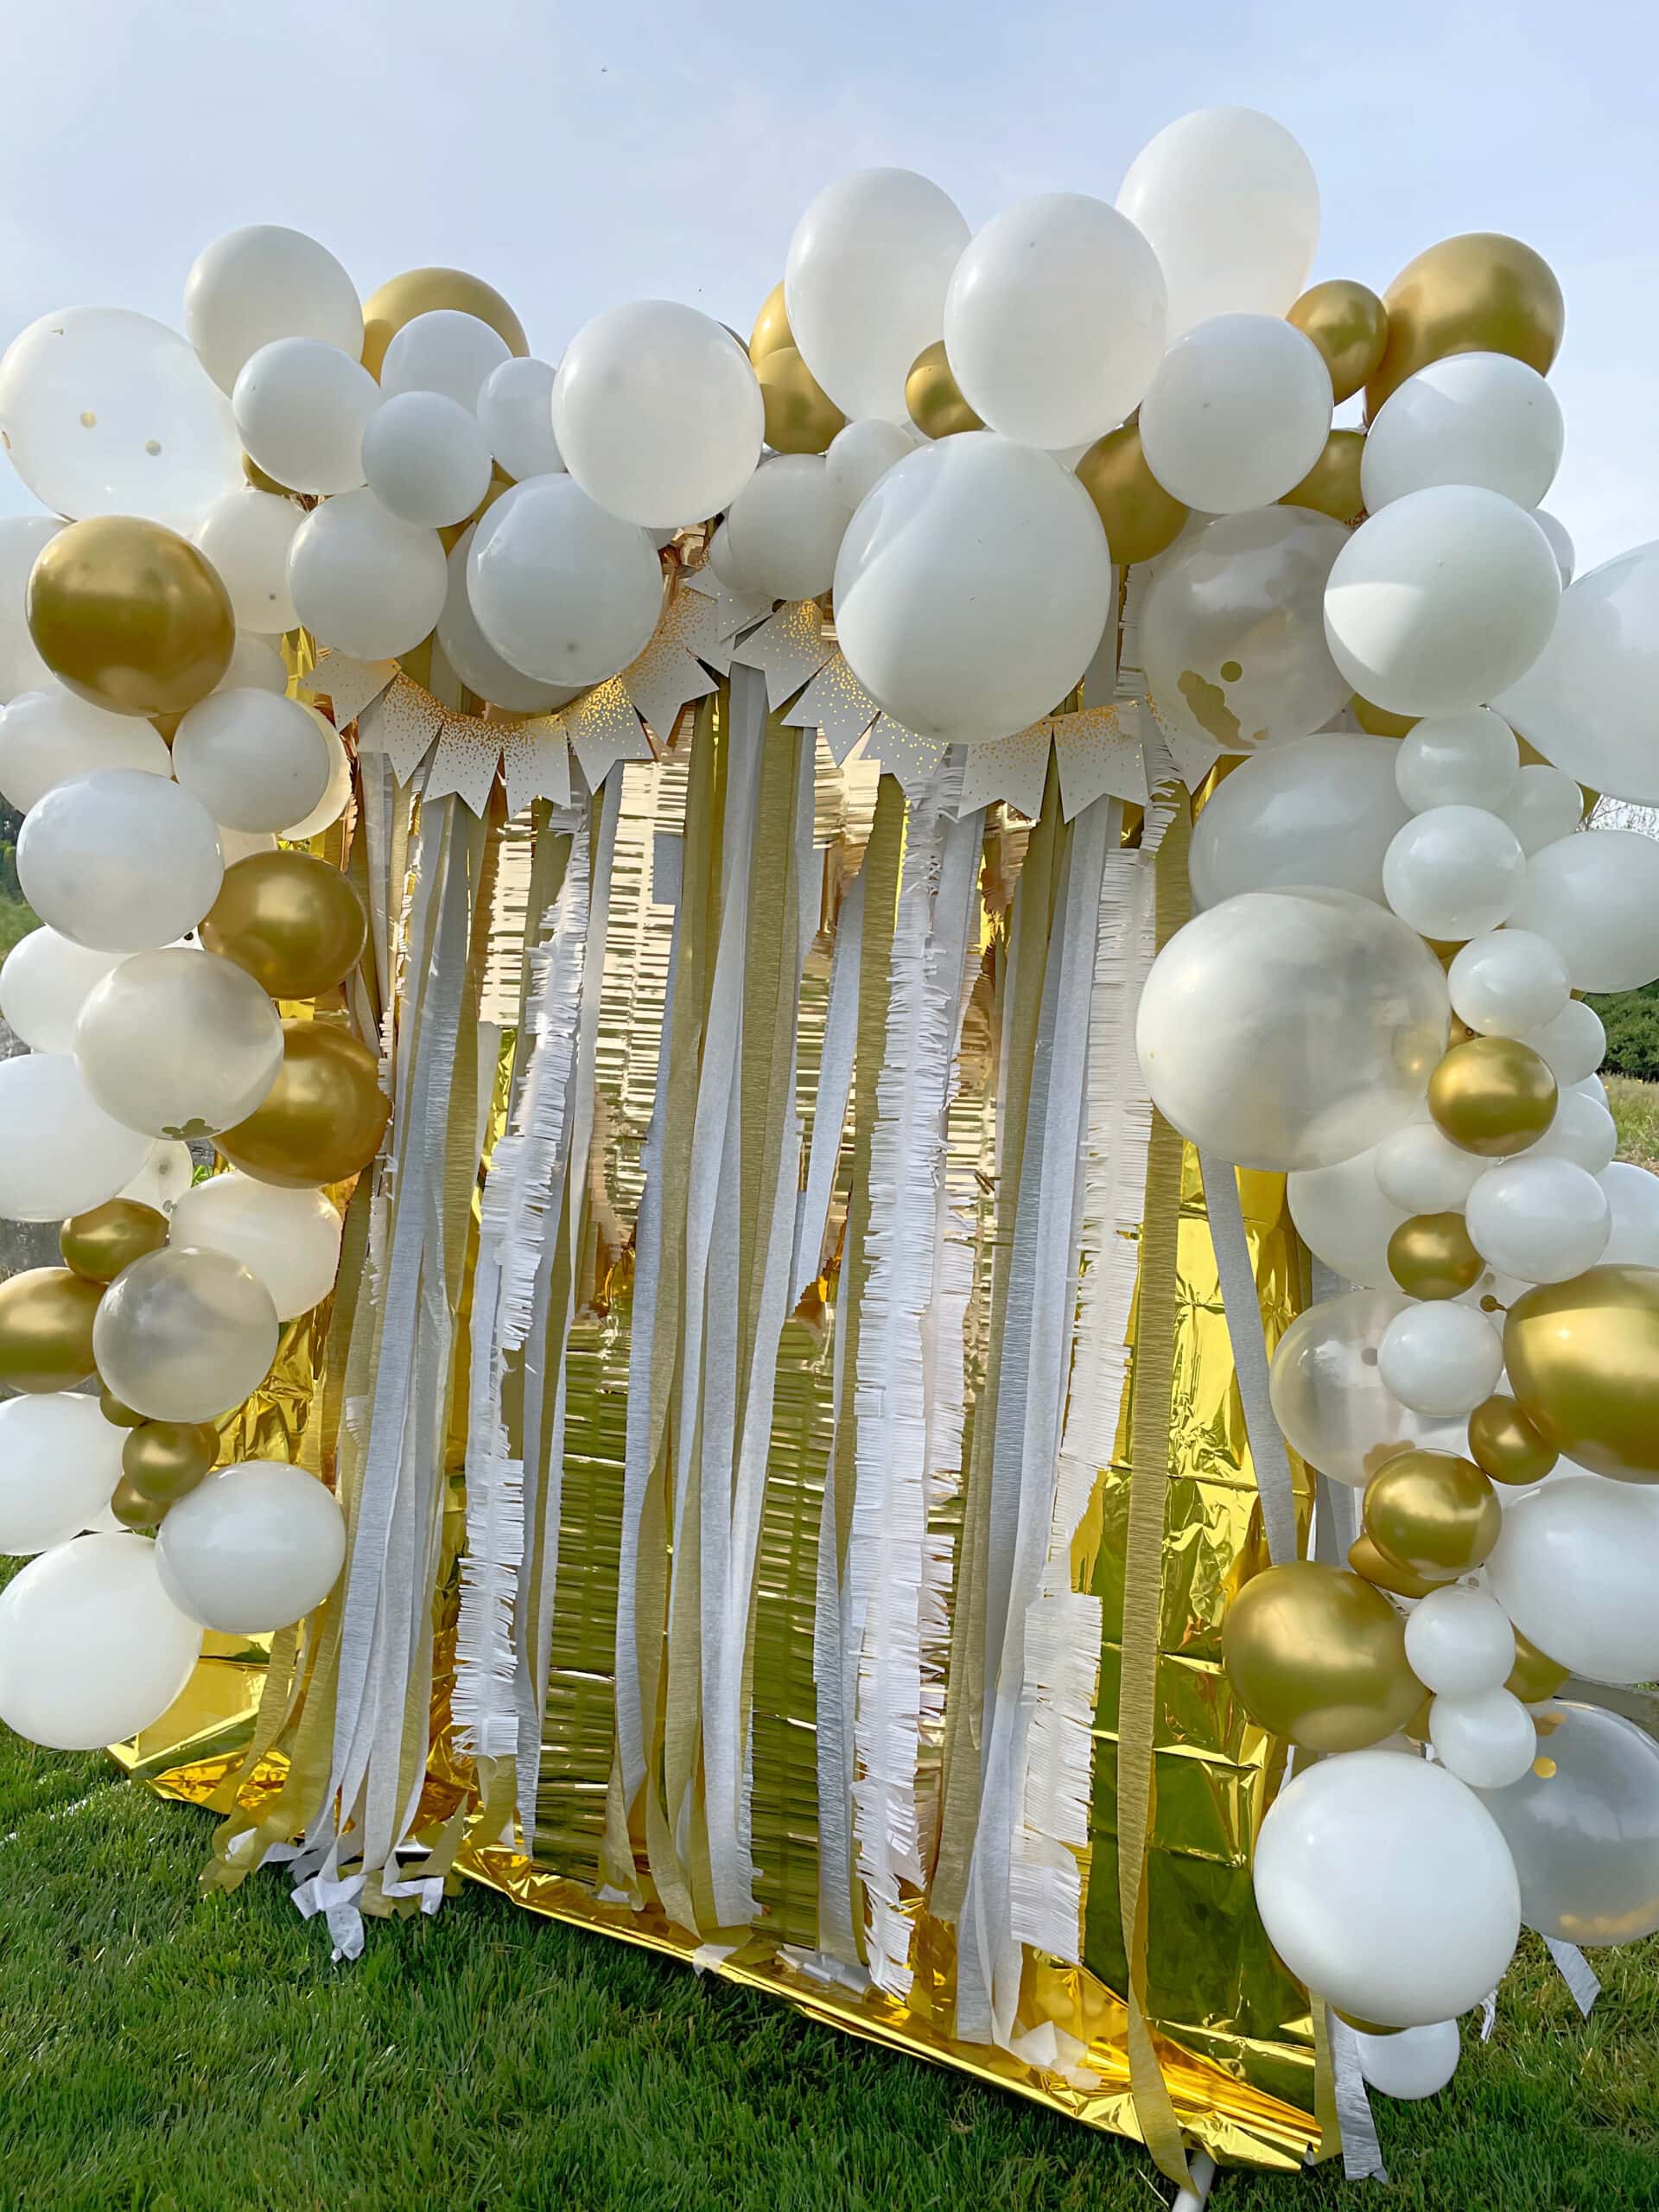
The Graduation Balloon Arch worked perfectly!

How To Make Balloon Arch (Step by Step Instructions):
1. Find the perfect kit.
There are TONS of options available at Amazon, and Walmart also has a nice variety of kits with banners too.
Tip: if you already have plenty of balloons, you can order the garland decorating strip by itself.

2. Blow up the balloons.
Thankfully my husband has an air compressor, so we blew up the balloons the night before assembling the arch. For best results you’ll want to blow them up no more than 24 hours before your event or they’ll lose some air.
If you don’t have an air compressor, I highly recommend a balloon pump like this one.

3. Tie the balloon arch garland strip between two chairs.
Tying the strip between two chairs will make assembling soooo much easier as you’ll work on a level space. The balloon arch garland strip is super easy to work with ~ just be cautious not to tug it too tightly as it may tear while you’re working.
Tip: If you have any issues with your garland strip tearing, simply re-tie the ends together (once your balloons are all attached, the garland strip will be completely hidden).
4. Sort balloons by color and size.
You’ll want to sort the balloons from largest to smallest and by color to make assembly go smoothly.

5. First, add only the biggest balloons to your strip.
Starting with your largest balloons first (In my kit it was the 18″ size). Attach to the arch garland strip. Insert the ends of each balloon into the holes on each side of the decorating strip, making sure to fill in both sides of the strip as you go.
Since each kit I used included 3 large balloons, I centered the first balloon in the middle of the garland, then added the other two largest balloons about two feet in from the ends of the garland strip. You’ll want to leave about 12 inches on either end of the balloon arch to have plenty of room to tie your arch when you’re ready.

6. Next, add in more balloons to the arch as you go.
After your first large balloons are attached to the garland, add the next largest balloons at equal spacing across the arch. Starting from largest to smallest sized balloons, fill in any spaces.

If you’re using multiple colors, stagger colors alternately across your arch.

7. Organize and fill in any empty spots.
Once your garland is hung, fill in any empty spots and move the balloons around. Check to see if you have any holes that need a larger or smaller balloon.

How to Make a Balloon Arch Frame

My husband created a Graduation photo backdrop using PVC pipe to mount our garland on, because our daughter wanted one at her party.
You could also easily hang your balloon arch or garland just about anywhere using command hooks attached to any wall or ceiling. This would look great hung over a dessert table using command strips!

We hung streamers on the balloon arch frame to complete the backdrop for graduation photos. I think it turned out so cute!
Balloon Arch FAQs (Pro Tips!)
Haha – I’m NOT a pro – but here are a few things that will make things go a little more smoothly if you’re wondering how to make a balloon arch:
What do I need to make a balloon arch at home?
To make a balloon arch, you’ll need balloons, a balloon pump, string or a balloon strip, tape or command hooks, and a frame (optional).
How do I get the arch to stay up?
You can anchor the arch using heavy weights, command hooks on the wall, or a pre-made stand to keep the balloon arch upright and stable. This should easily help keep your balloon arch up for 24 hours.
How long does it take to make a balloon arch?
I would give yourself 2 -3 hours. This will vary based on the size of your arch, but to create a 20 foot arch, we used 3 kits and it took about 45 minutes to blow up the balloons and another 45 minutes to create the arch. Then you’ll want to factor in time to hang it just right from a frame or using command hooks
Do I need to use helium balloons?
No, we used regular latex balloons blown up without helium and our arch held up perfectly. However, if you want yours to last for a long time, it might be worth purchasing this helium balloon kit.
Do I need a pump to make a balloon arch?
You don’t necessarily need a balloon pump to get this project done, but it will make the process go much more quickly. Use an air compressor or electric balloon pump like this one if you’re planning to create a large scale arch.
What size balloons are best for an arch or garland?
The kit we used included 18″, 12″ and 5″ sized balloons and worked perfectly.
Do I need a special balloon arch strip to make a balloon arch?
Having a special arch garland strip will make creating an arch SO much easier. It means you don’t have to get creative with fishing line, or glue guns or any other nonsense.
Plus – they’re honestly not very expensive and make the project way faster and simpler! Strips like this one even include glue dots to use as you make your arch stay in place a little better.
Last Tip: Use the glue dots to keep the balloons in place.
We totally skipped this step and our arch held up fine, but if you’re planning to have the arch up for several hours and don’t want anything to move, attach the glue dots to keep all of your balloons in their place. You can also order glue dots by themselves on Amazon here.

How much does a balloon arch cost to make?
Around $40. If you pay someone else it can cost anywhere from $10 per linear foot to $90 per linear foot (which is kind of crazy!) This project may look daunting, but for under $40 you can make a large balloon arch very simply using the tips here. I was truly amazed at how easy this project was and am so glad I didn’t pay someone else to make this for me!

Can you create a half arch?
If you want to create a curved half-arch balloon garland – the easiest way to make it is by hanging with command strips.
You can also buy a traditional balloon arch frame like this circular one – but only cover it half way, creating a curved half arch.
I’d love to see pictures of balloon arches you’ve created for parties – and hear any tips you might have learned along the way!


How many balloons did you use?
I think it was two kits. The link for the kit is in the post. I hope that helps! 🙂
Where did you get the streamers you put on the PVC Pipes. They look great!
Michael’s also carries the gold and white streamers in their party section!
Additional suggestions: Don’t overinflate balloons. As you fill balloon with air, squish it to create a round shape. For $10 you can buy a balloon sizing tools on Amazon if you plan to create balloon displays often. I like dollar store double sided tape better then the glue dots to for attaching balloons together. Fishing line is great for connecting a long display of balloons for garland. Pinterest has a lot of ideas for diy frames for balloon structures like your pvc one.
Do you happen to have the directions for the PVC stand?
I’m sorry, Dana, I don’t. The instructions were included in the kits I bought from Michaels.
I desperately need this pvc design ASAP prettttttyyyyyyy please?
I’ll check with my hubby but in the meantime these two look very similar to what we did, hope that helps! https://www.downhomeinspiration.com/10-10-minutes-diy-photo-backdrop/ http://www.dandelionsonthewall.com/2012/04/diy-photography-backdrop-stand-pvc-pipe.html
How did he make the pvc stand. Size pipe he used? Attachments? Please give details
Hi Denna! I’ll ask him to write it up for you (he’s an engineer so I’m pretty sure he just winged it, but hopefully he’ll have notes!)
I found the plastic strip recently at Dollar Tree! They additionally have balloons. I’m not certain if they have oversized balloons or not…
I would love to hear all about your experience with your daughter’s graduation party! Your article on your son’s graduation party has been one of the most helpful and fun ones for me that you have ever written, so I would love to see what you did differently this time!
This turned out beautiful. I’m going to try and make one for my daughter’s Bridal Shower. Could you tell me what you used for the streamers hanging in the center of the bar? Also, is there directions for the PVC bar.
I love following you. You always have realistic ideas!
Wow Great job. I turned out great. You and your husband so talented.
Thank you – he’s pretty amazing! 🙂