
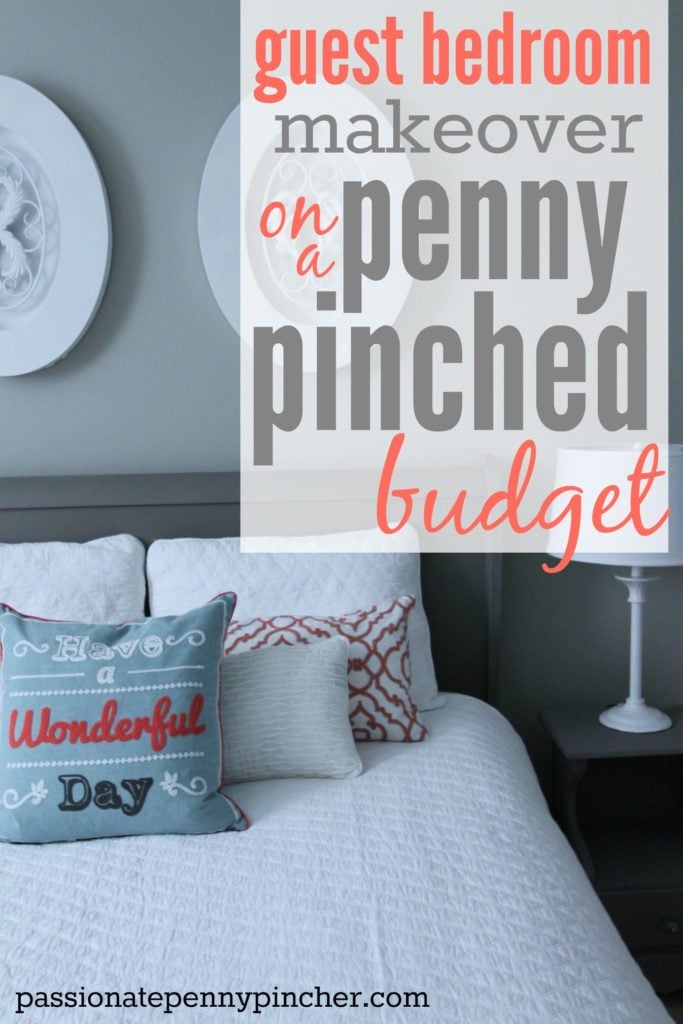
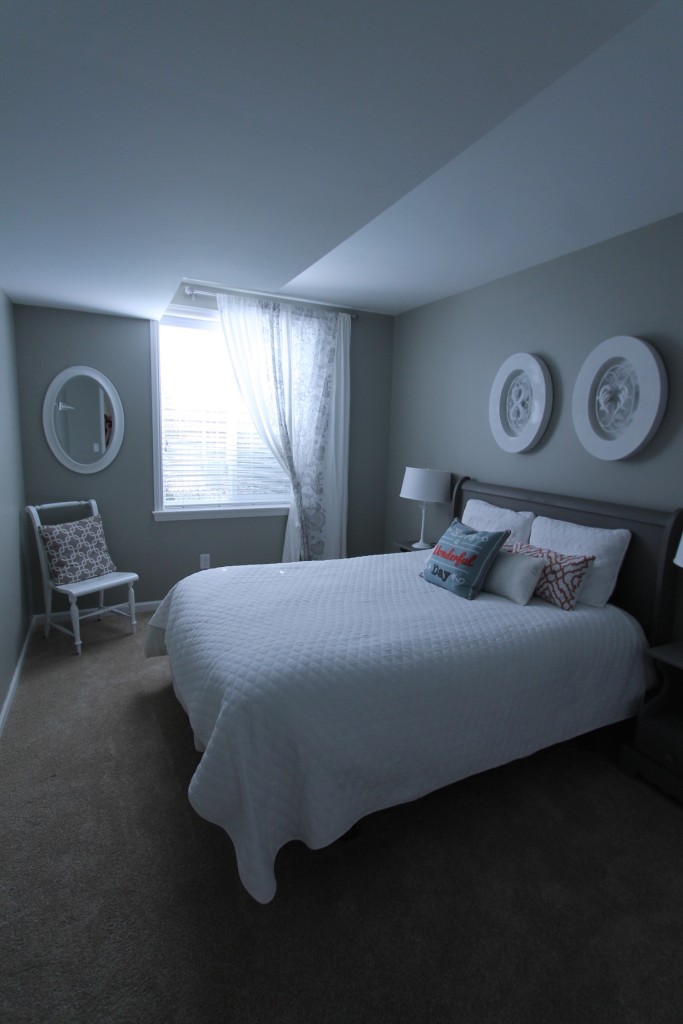
I am so stinkin’ excited to finally share some updates of our guest bedroom with you! Remember a few weeks ago when I shared how I used homemade chalk paint to repaint a $48 Goodwill headboard? Well I also used it to update the furniture in the bedroom, and painted the room as well.

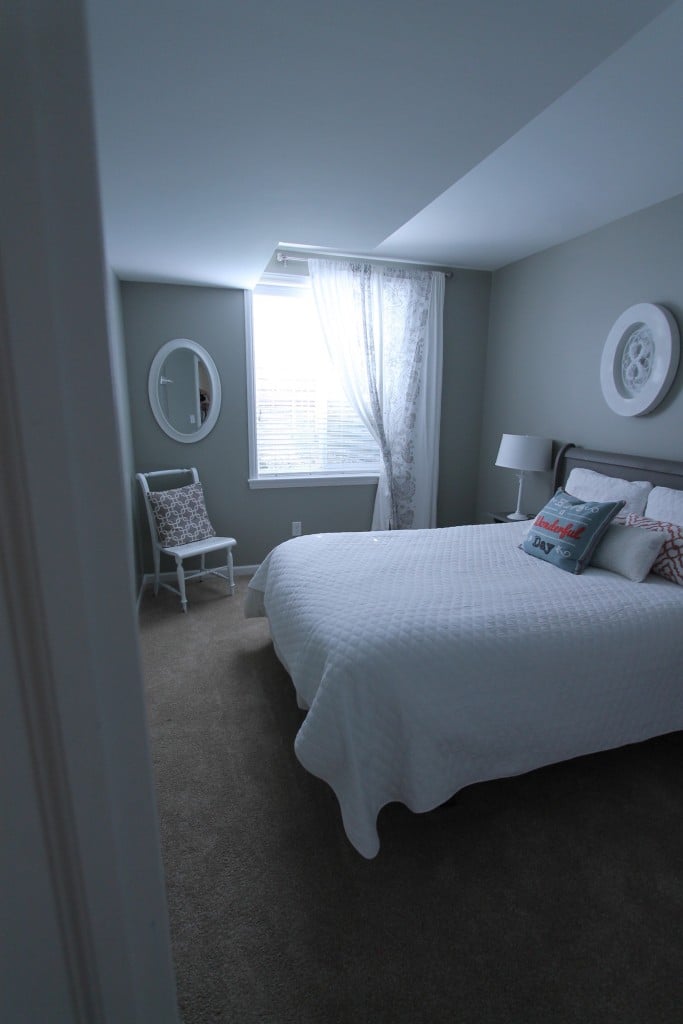
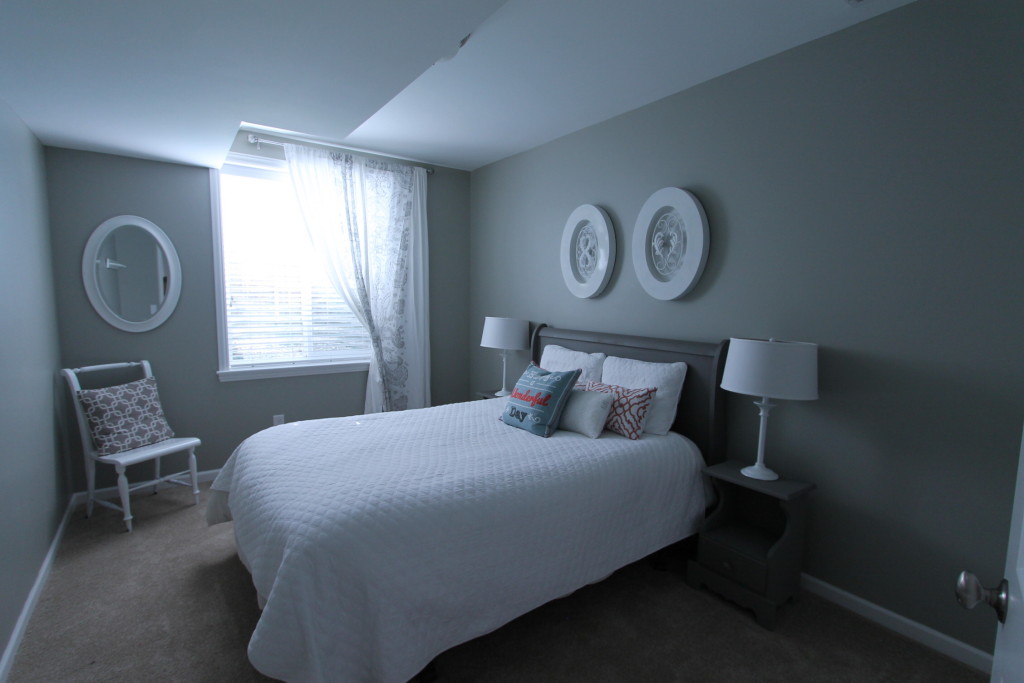
The guest bedroom is a small room in our basement with just one small window (which actually leads out to a window well so there isn’t much light in that room.) I’ve never painted anything grey in my life (and really have never been a big fan of grey?), but after seeing it more and more often in rooms as I’ve scrolled through Pinterest, I decided this was my chance. Here’s a peek at the before and after . . .
Before
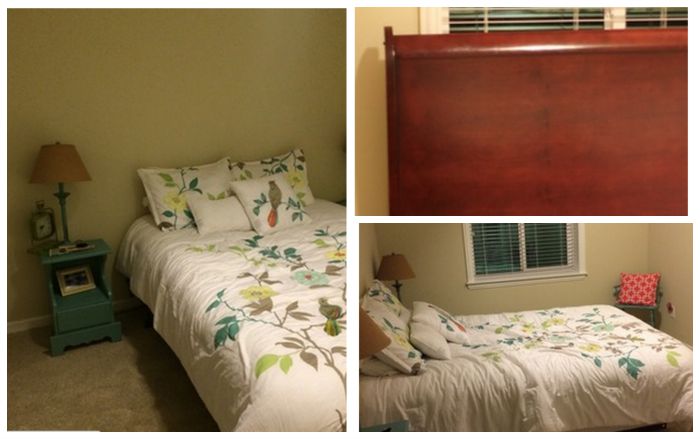
After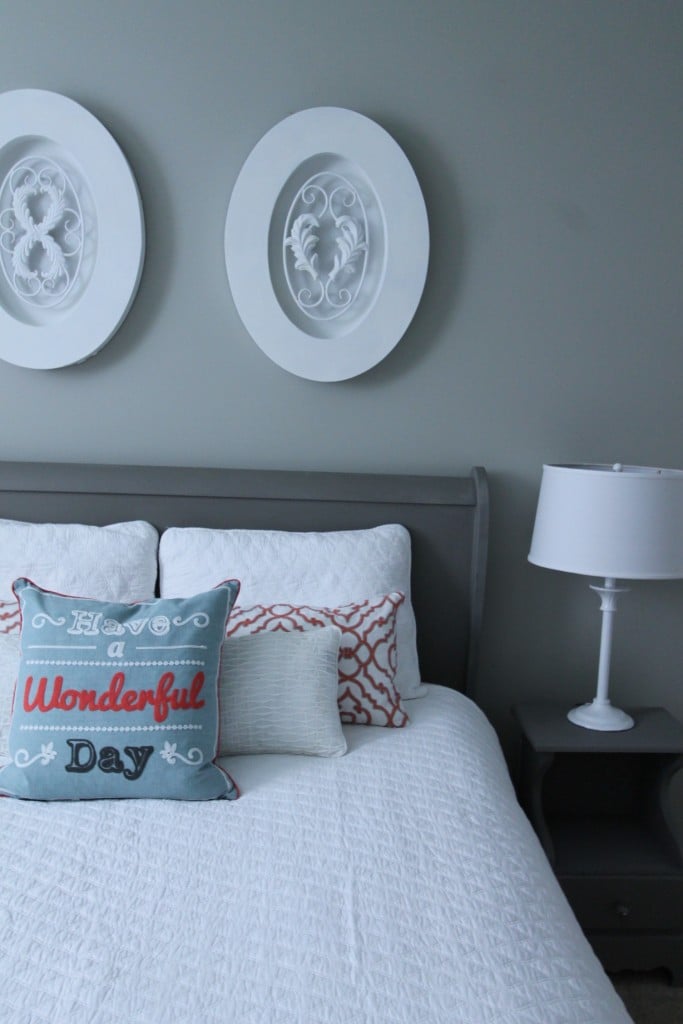
Here’s how I did it on a (mostly) penny pinched budget . . .

1. Re-used lamps from our dining room by re-painting them white. (Perfect as I recently replaced them with Goodwill lamps that were spray painted as well.)
Cost = $16 for 2 new shades at the Ballard Design Outlet in Cincinnati

2. Added curtain panels to window and tied them back using hidden clothespins.
Cost = $14.99 for curtains and $19.99 for rod set at TJMaxx

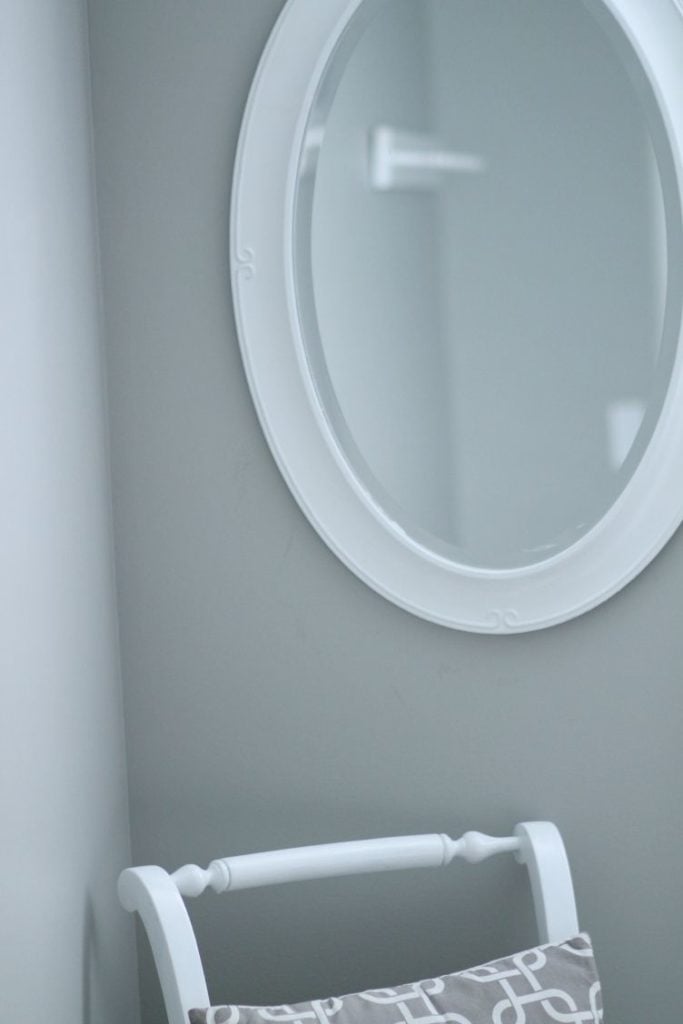
3. Added a chair and mirror from other rooms in our house that were no longer being used. The chair had been painted black and the mirror was off white, so I just repainted them to match.
Cost = $0 (I already had the paint on hand)
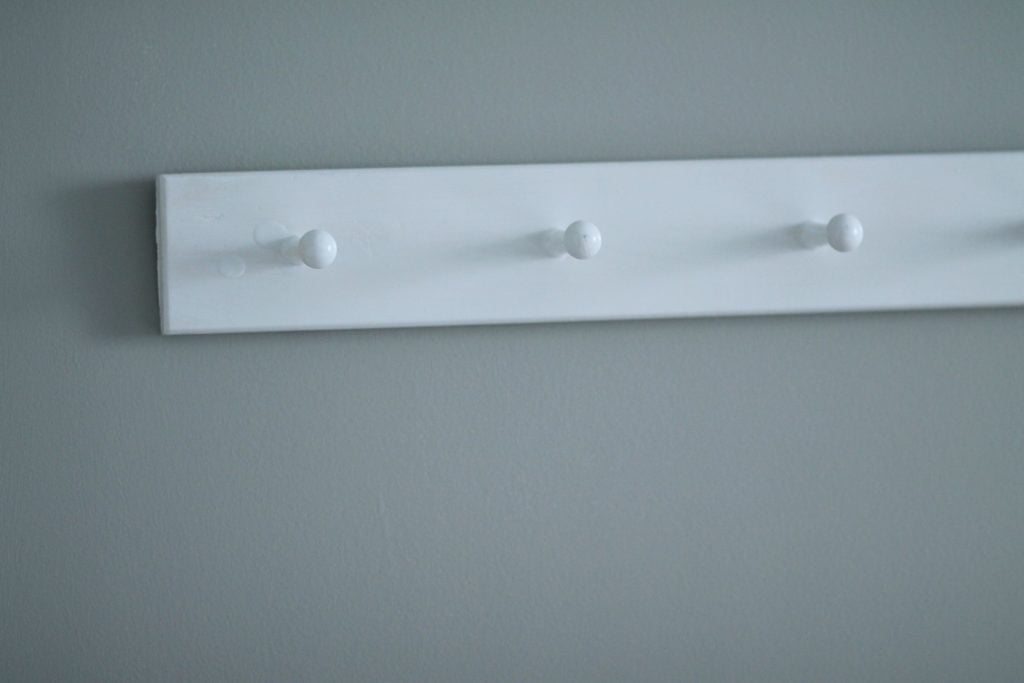
4. Added a simple wooden set of hooks for hanging clothes.
Cost = $0 (I picked these up years ago from my the basement of my in-law’s home because they were no longer in use – love that!)
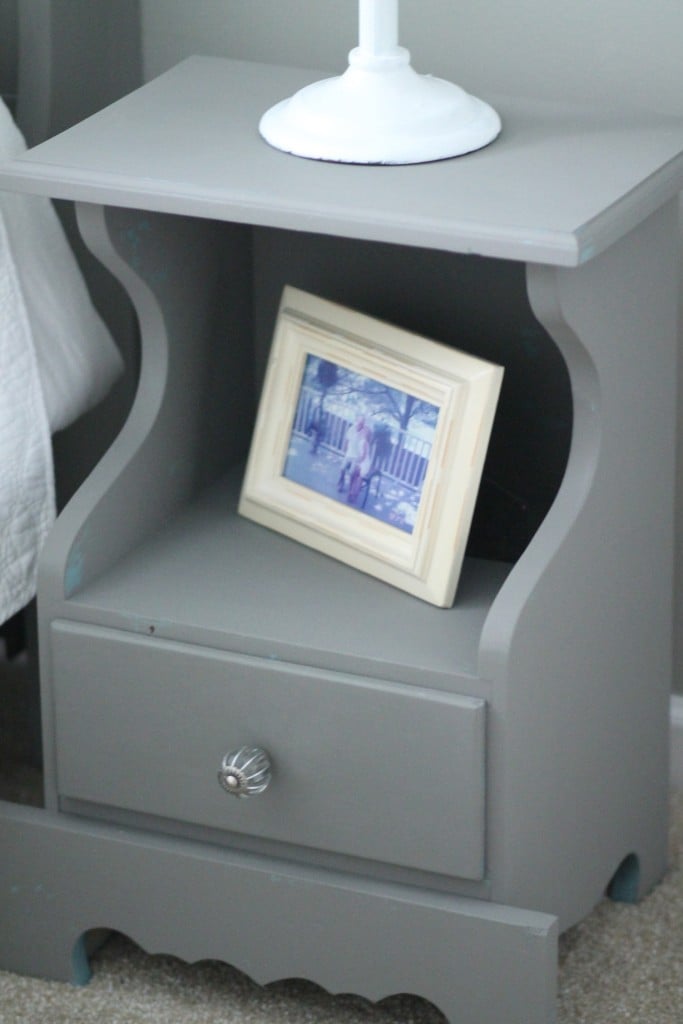
5. Re-painted these super cute nightstands in grey.
Cost = $10
These nightstands are my favorite garage sale deal ever. About nine years ago my neighbors were selling them – both he and she had made them in shop class in high school but they didn’t match (I think one was oak and one was maple.) I paid $10 for them and have repainted them three times depending on the room they’re in!
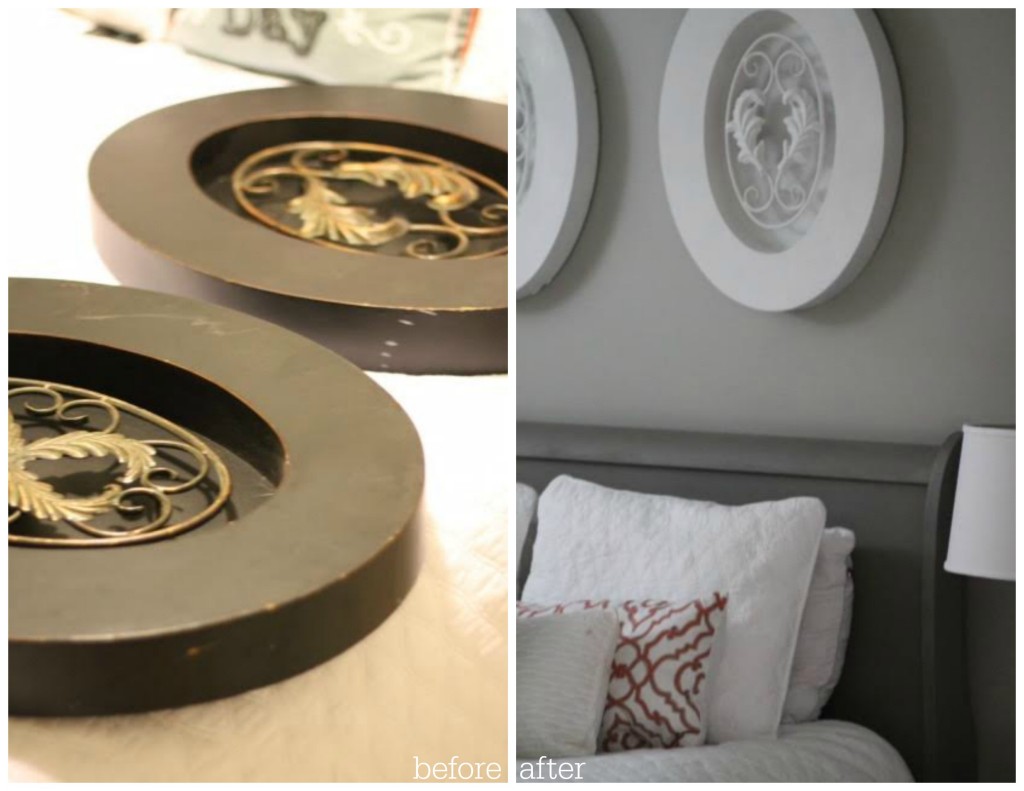
6. Updated these old wall hangings with a little fresh paint.
Cost = $0

7. Repainted a Goodwill headboard with chalk paint.
Cost = $48 for the headboard, $.50 for the chalk paint by using a mismatched sample in the bargain bin
8. Repainted the bedroom
Cost = $38 for paint
I used the higher grade paint at Home Depot because it goes on easily with one coat – so worth it for me to save time and extra paint!
9. Bought new bedding at TJMaxx.
Cost = $129
This was by far the biggest expense in the room. I just didn’t see any thing else that I loved, and I love the way fresh white bedding looks in a guest bedroom. Since everything else was pretty penny pinched, this was a worthwhile splurge!
The total cost of the update came in at $217.98, and I do wish I’d looked a little harder for less expensive bedding (but I really do love how this looks in that space! The only thing I didn’t consider before updating the room was the color of the carpet (eek!)

Honestly, until I saw it in these pictures I never even noticed it was so beige (it looks pretty neutral normally, and I just didn’t pay attention to it at all!) It does show up a bit more in the pictures, but I’m still pretty pleased with the results.
I really do love the grey though, and it was a great way to try out a new color in a safe spot that could be different than the rest of the house.

So there you have it! Do you have any other suggestions on how to update a room on a budget? I’d love to hear your ideas – leave a comment to share! (And feel free to share your updated pictures on the PPP Facebook page – I’d love to see what you’re up to!)
I’d love for you to join me over on Pinterest (I love that place!) If you have a blog and have done a little fluffing in your home, I’d love to see it, so leave your link in the comments section. Also, if there’s a craft you’ve seen on a website that you’re hoping to make, feel free to share that link as well (I’m always looking for new ideas!)
See previous Friday Fluff Up projects and ideas . . . and Happy Fluffing!


Hello! I love your article ideas, thank you for sharing. I thinking my decoration in chubby chic. Q. I’m allergic to the chalk, so what kind of paint I can use instead of?
Any regular paint will work Ingrid!
Looks great! The only thing I would add is an accent rug to cover the carpet & tie everything into the color scheme. Lovely!
Great idea Melody – I’ll start watching for one because that would definitely help!
i absolutely love it!
Thanks so much Cheryl!
Hi Laurie! It looks great! Where did you find that lovely embroidered pillow? 🙂
Thanks Jennifer! TJMaxx – I love that store 🙂
Looks great Laurie! I love the grey walls. I am going to be repainting a couple basement bedrooms in the fall and I think I am going to try and talk one of the boys into grey walls…love it!
I NEVER would have done grey a few years ago, but love it in this room (even in the basement!) I think it would be great in a boys room – even with black painted furniture. I’d love to see your before and after pictures when you do it! 🙂
Laurie. What is the wall paint color name?
Thanks in advance. I want to do my sons room grey but haven’t found one I like.
Hi Heather! I’m not at home this weekend but will let you know when I’m back home!
I would love the paint color name too!
Thanks!