
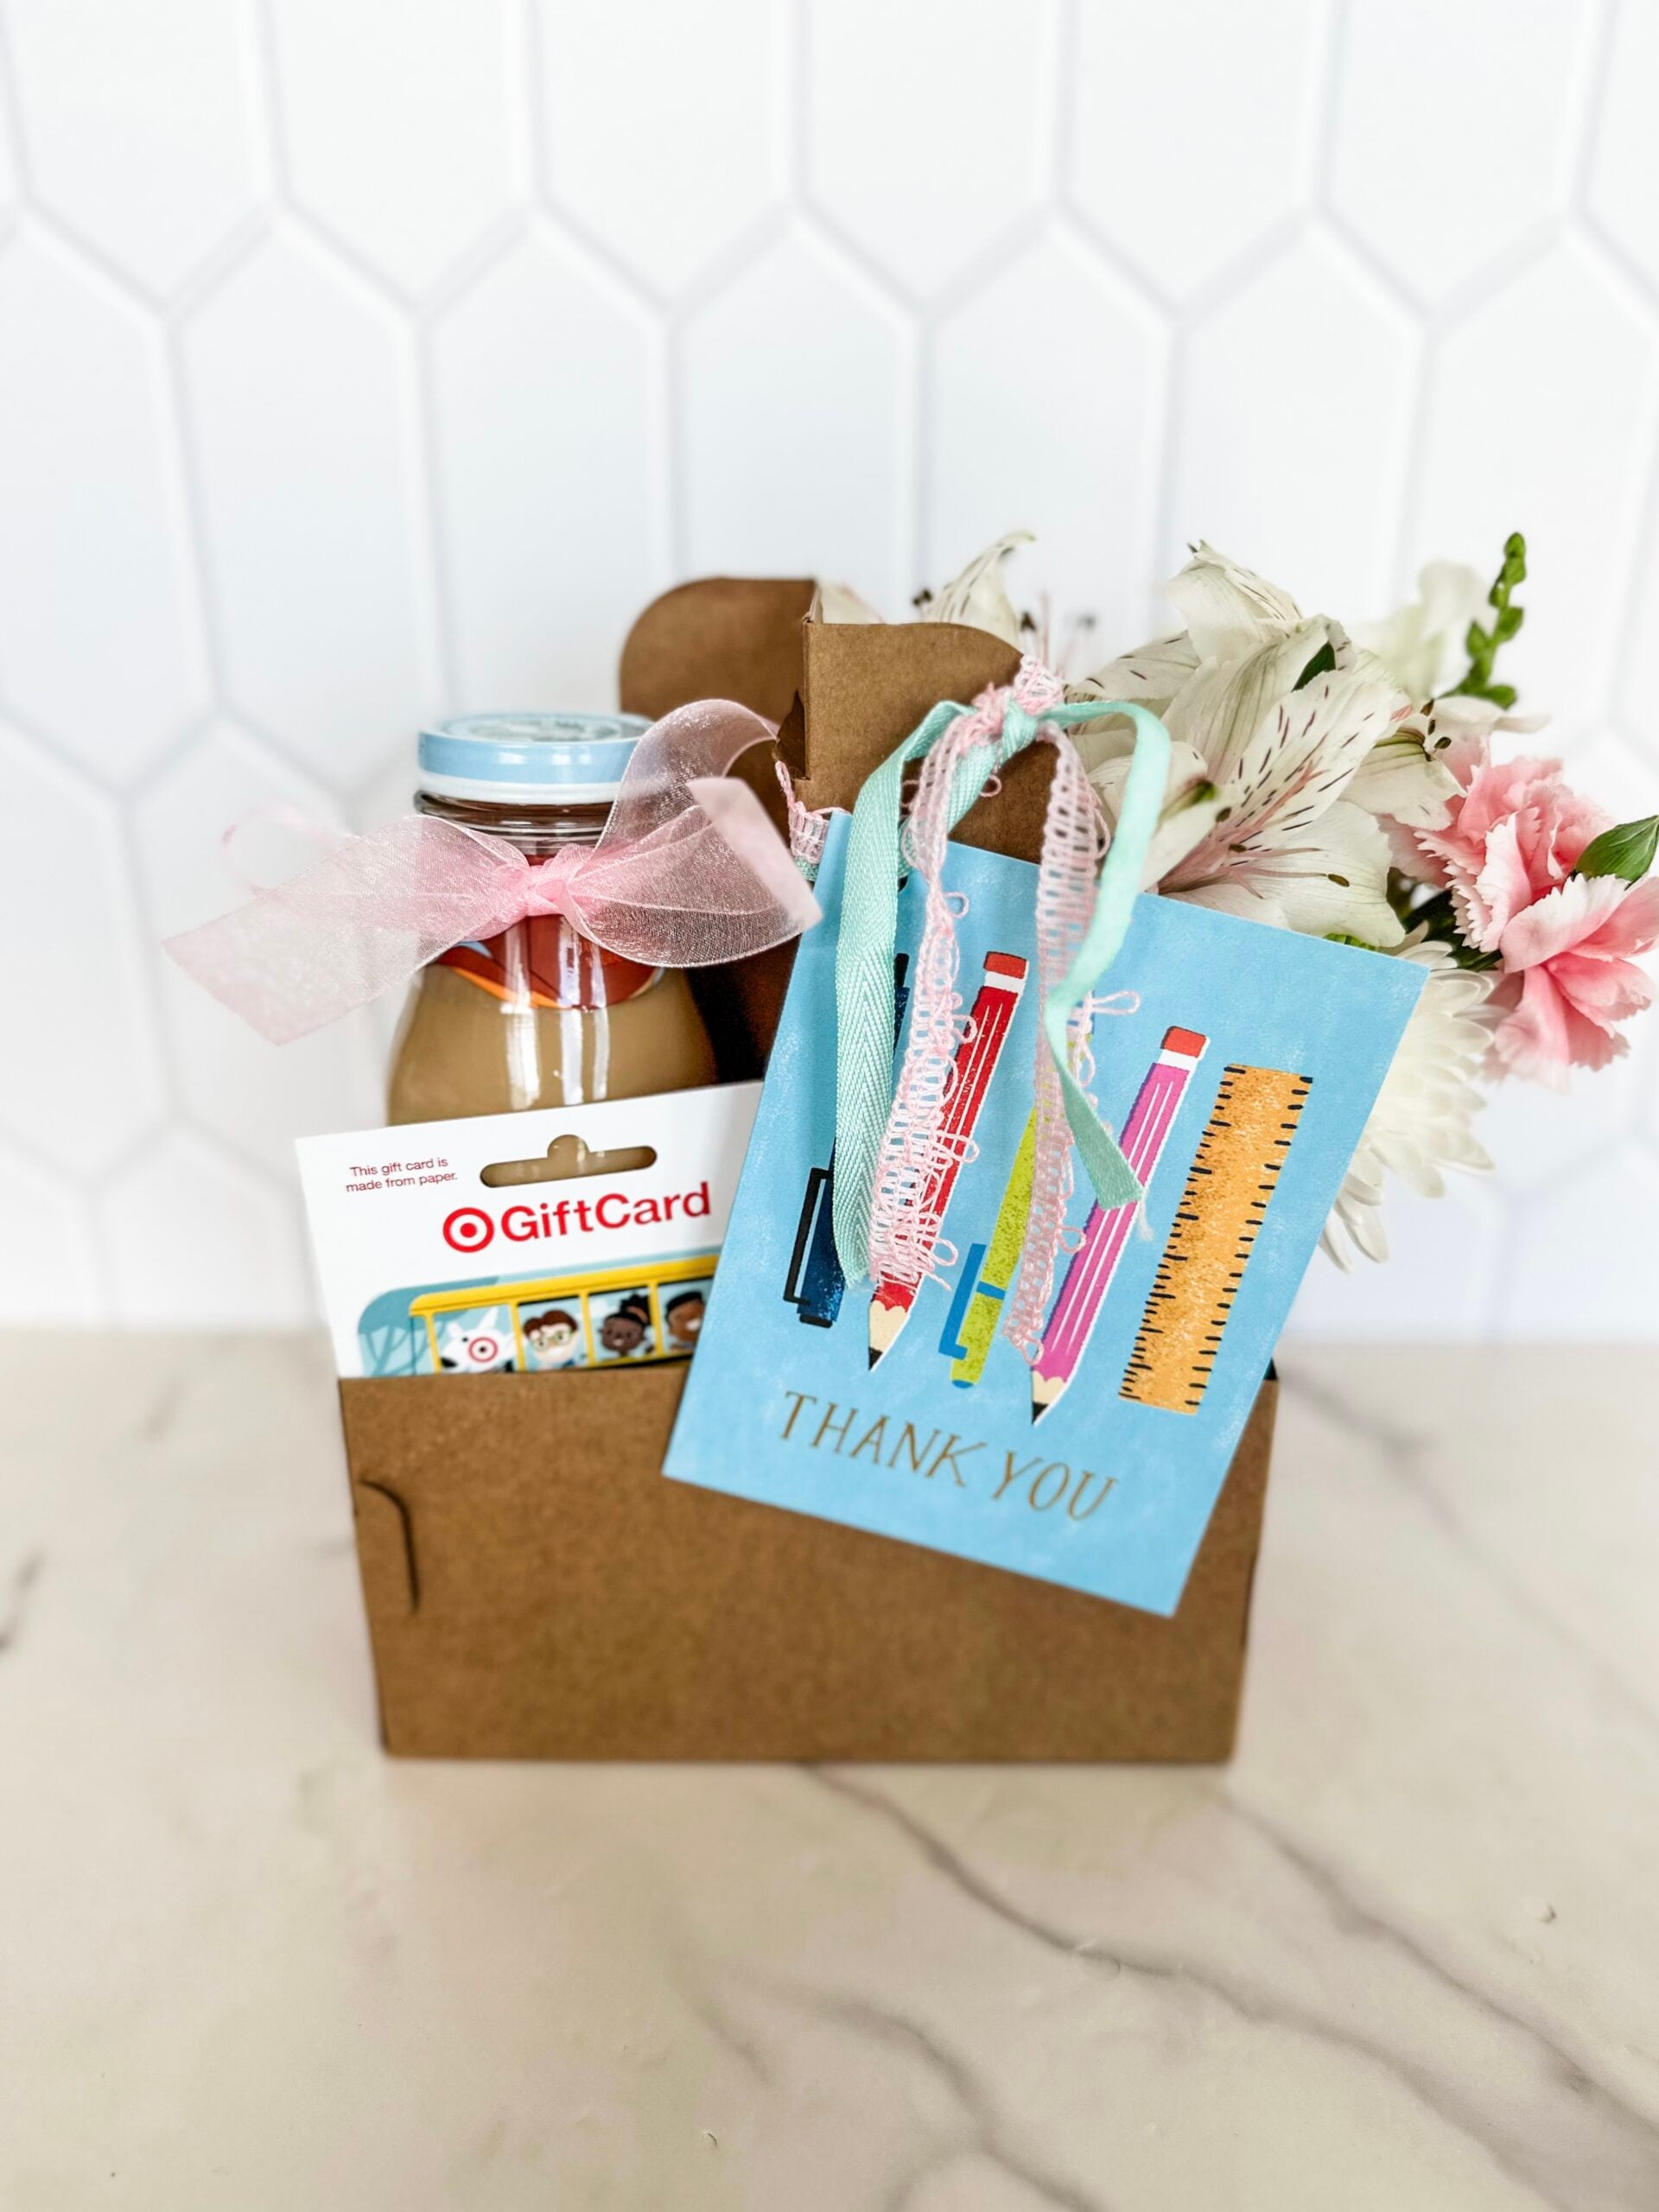
Turn a Simple Cup Holder into the Cutest Gift Basket Ever!
If you’re looking for an easy, affordable, and absolutely adorable gift idea, you’re in the right place! Transform an ordinary cardboard drink holder into a charming cup holder gift basket — perfect for Teacher Appreciation Week, Mother’s Day, or any time you want to brighten someone’s day with a thoughtful surprise.
This project is simple enough to do with kids, budget-friendly, and easy to customize for any occasion. Plus, it looks like a boutique-style gift without the boutique-style price tag!
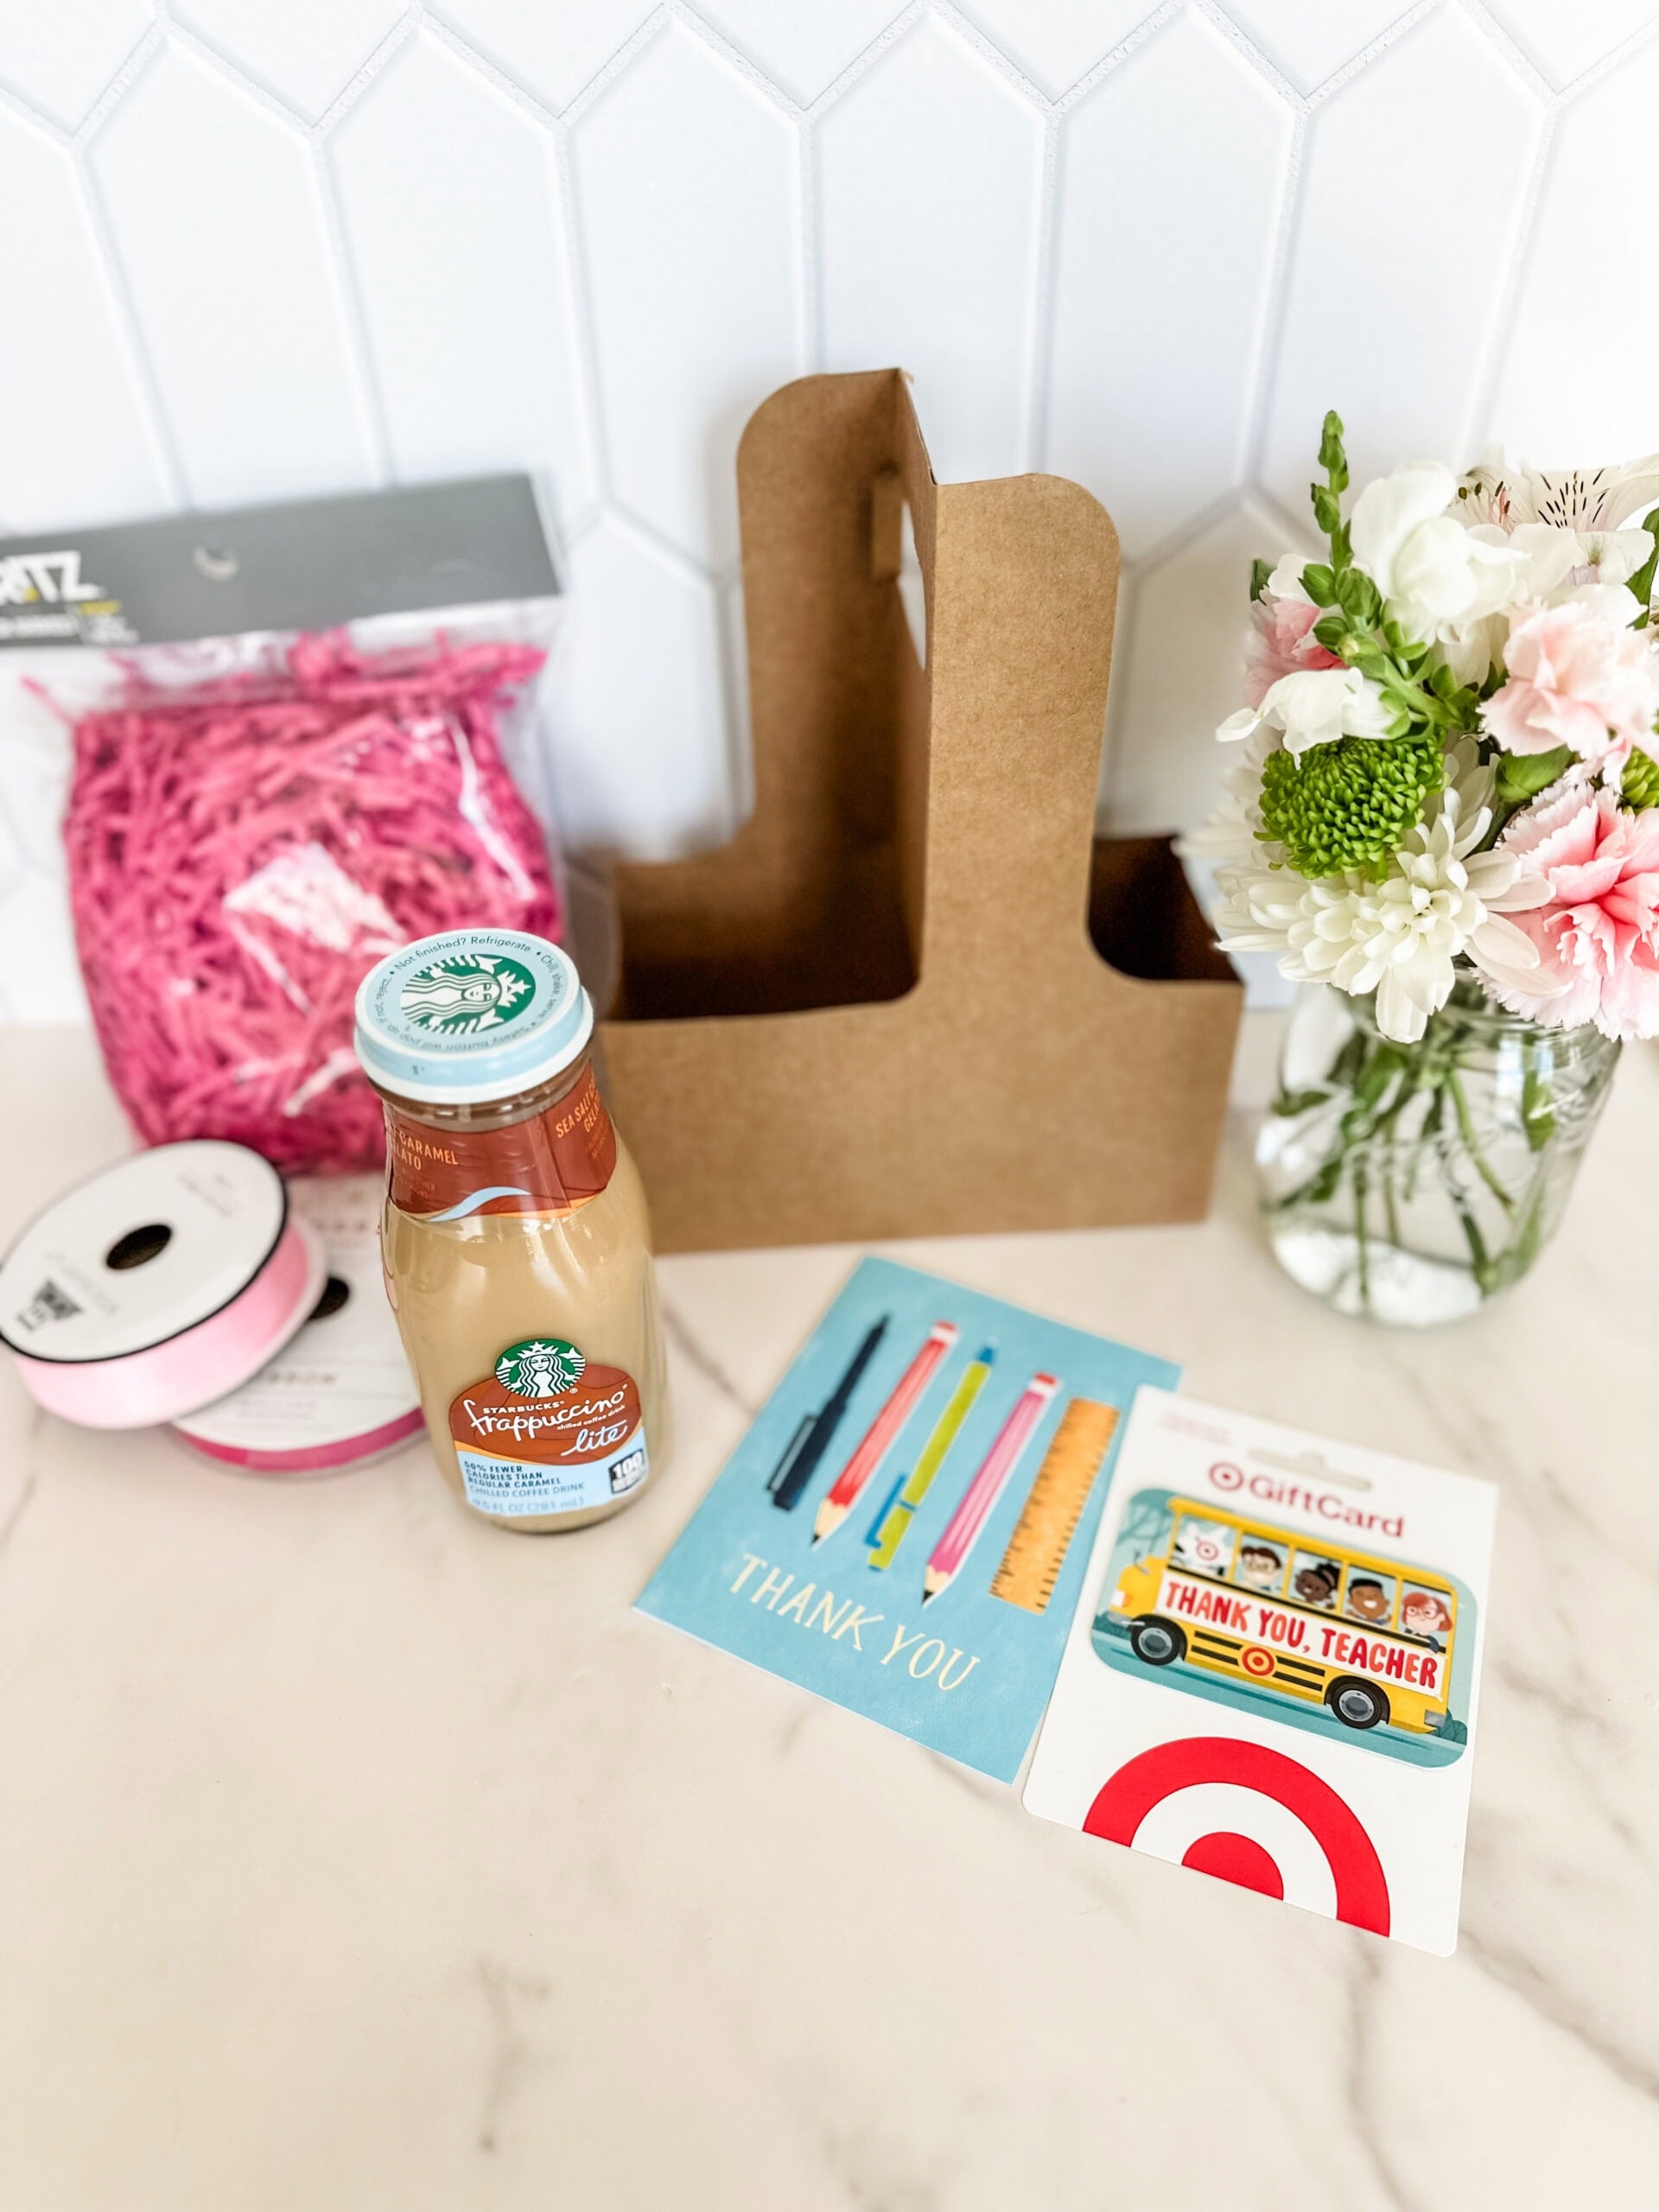
What You’ll Need for this Coffee Cup Gift Basket:
- Cardboard Cup Holders (I ordered a 15-pack on Amazon)
- Small Vase or Mason Jar (to hold fresh flowers)
- Fresh Flowers (a small bouquet or a few bright stems)
- Bottled Coffee or Fun Beverage (think cold brew, sparkling water, or fancy juice)
- Gift Card
- Thank You Card or Gift Tag
- Ribbon
- Paper Shred (you can find this in the party section or your favorite craft store)
Optional extras to make it even more special:
- Chocolates or candy
- Packs of gum or mints
- Mini lotions, hand sanitizers, or lip balms
- Pens or cute notepads
Step-by-Step: Let’s Assemble the Perfect Cup Holder Gift!
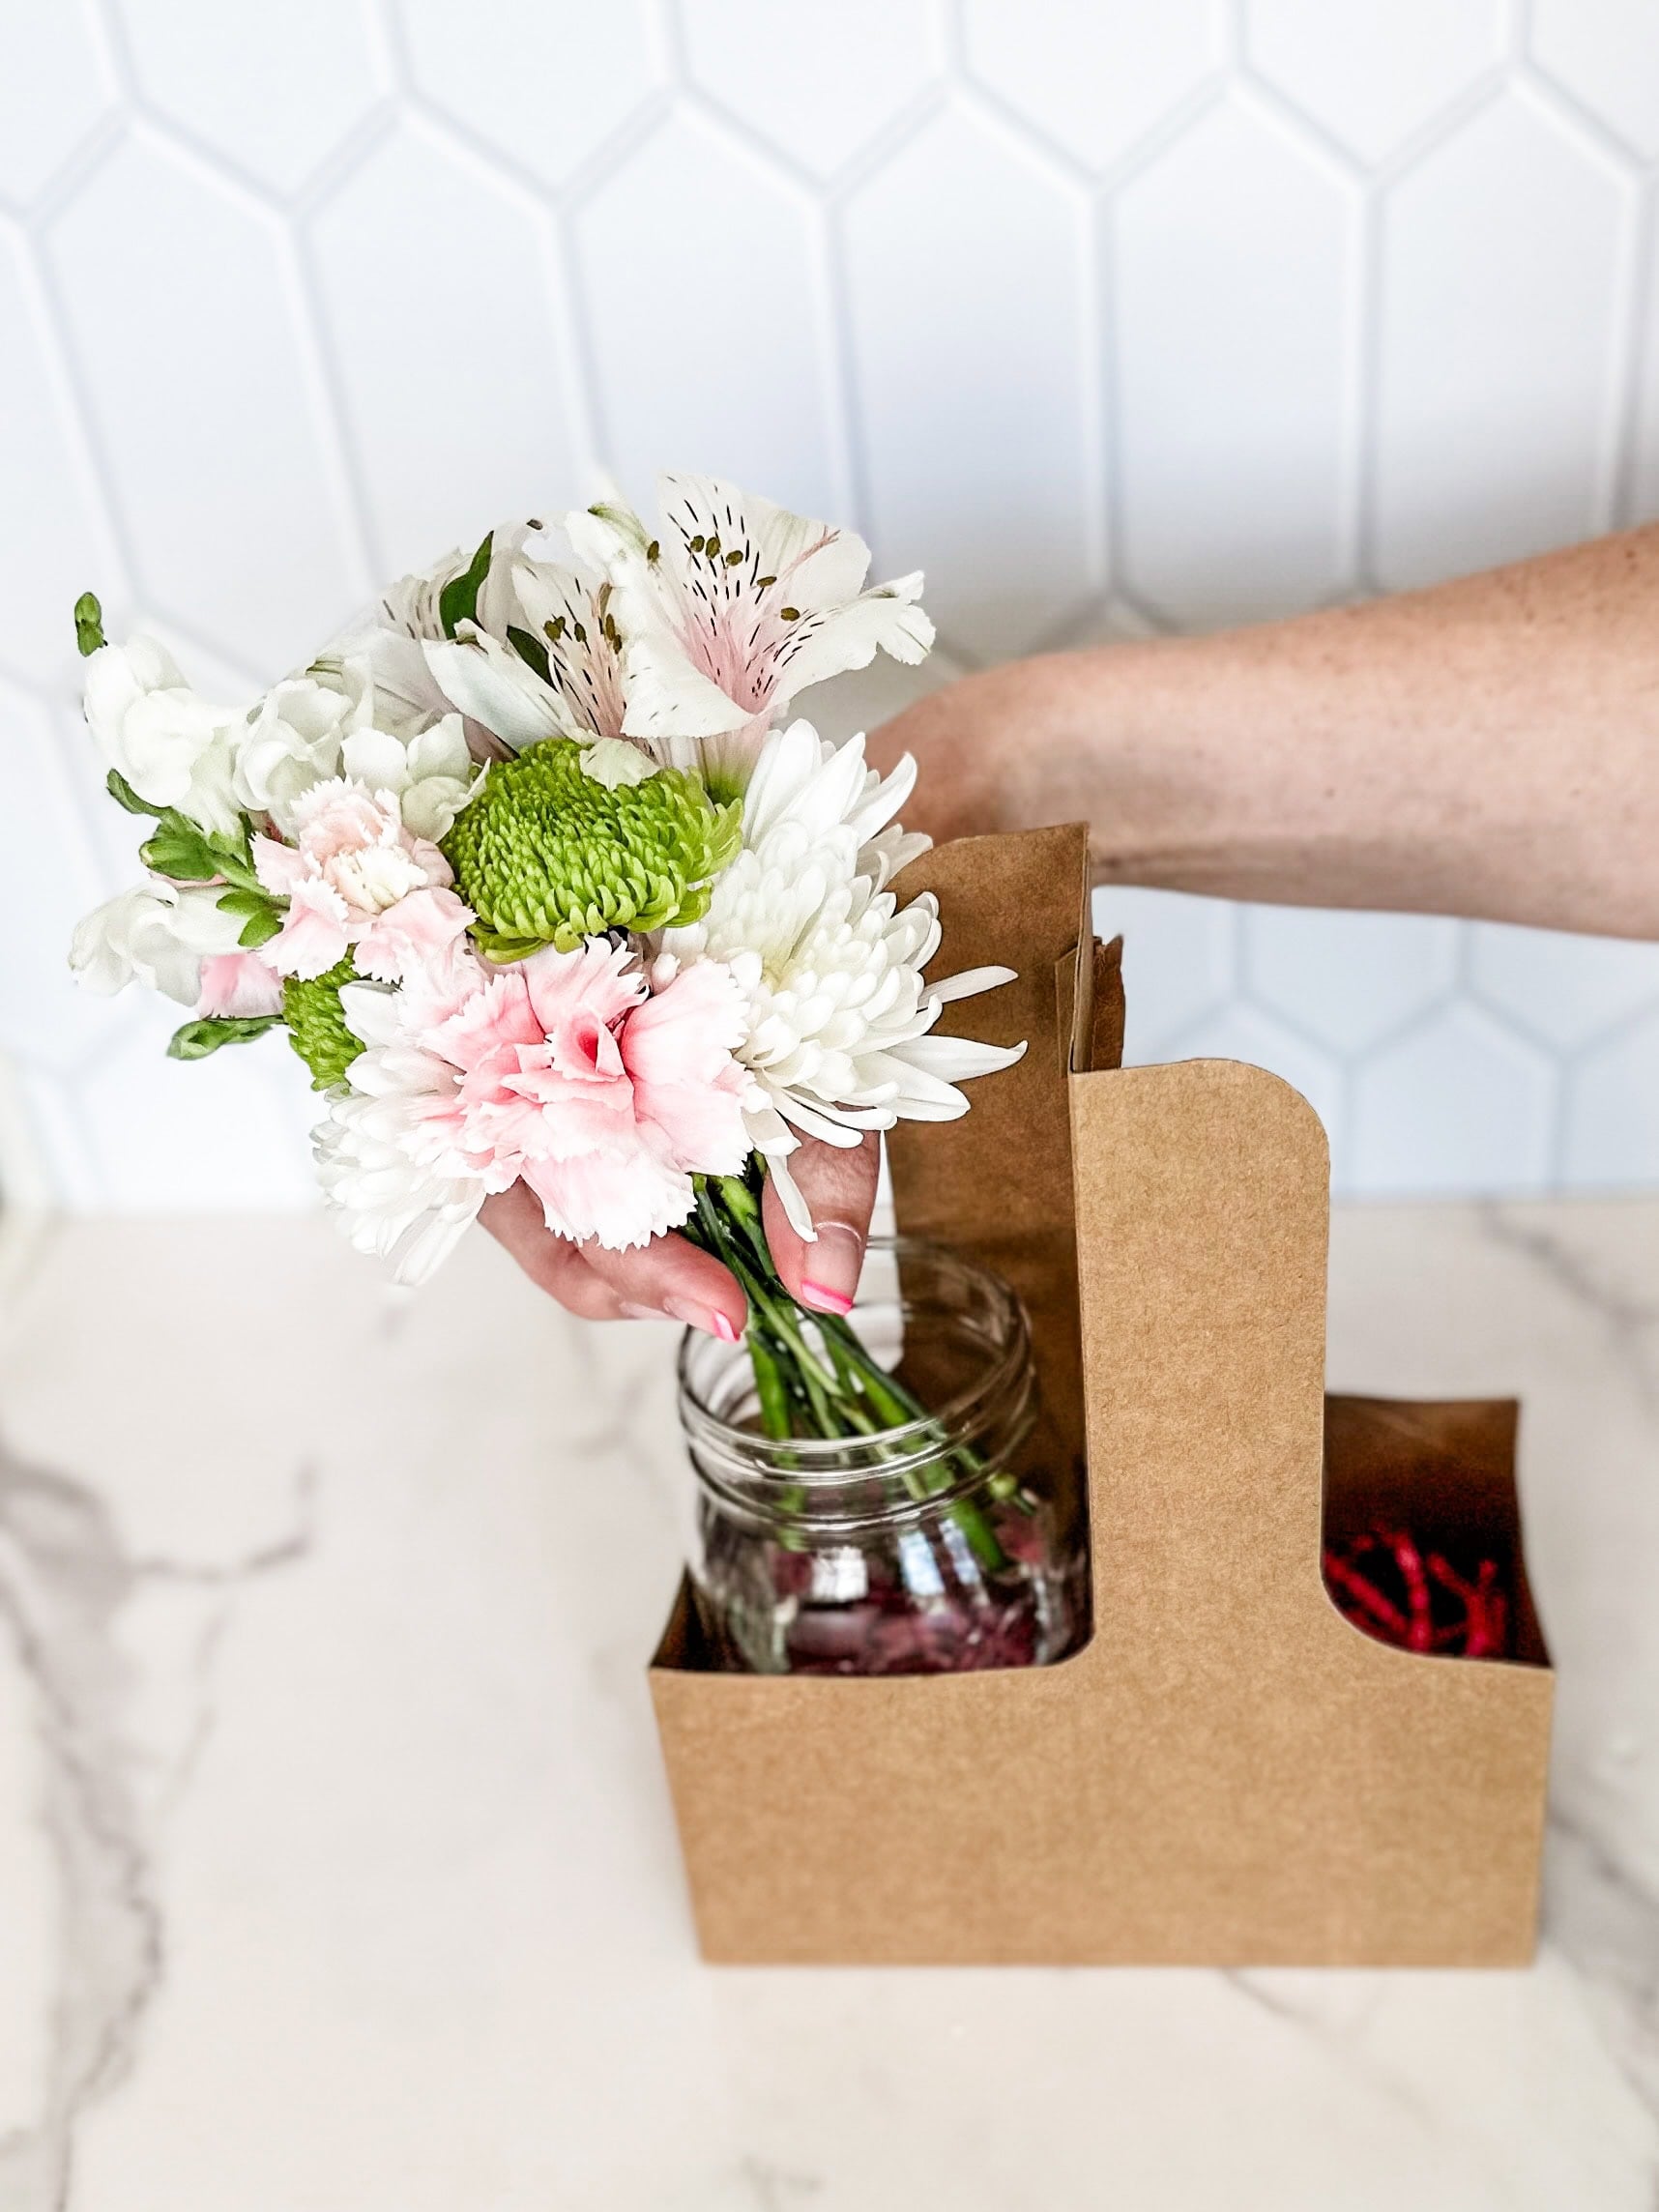
1. Start by folding the cardboard cup holder into its upright, sturdy shape. Most cup carriers have creases and folds that make this super easy — just pop it up and it’s ready to go.
2. Place a generous amount of paper shred into both sides of the cup holder. This adds a cozy, festive base for your gifts to sit in and keeps everything snug and secure. (If you don’t have paper shred on hand, you could also use a piece of tissue paper.)

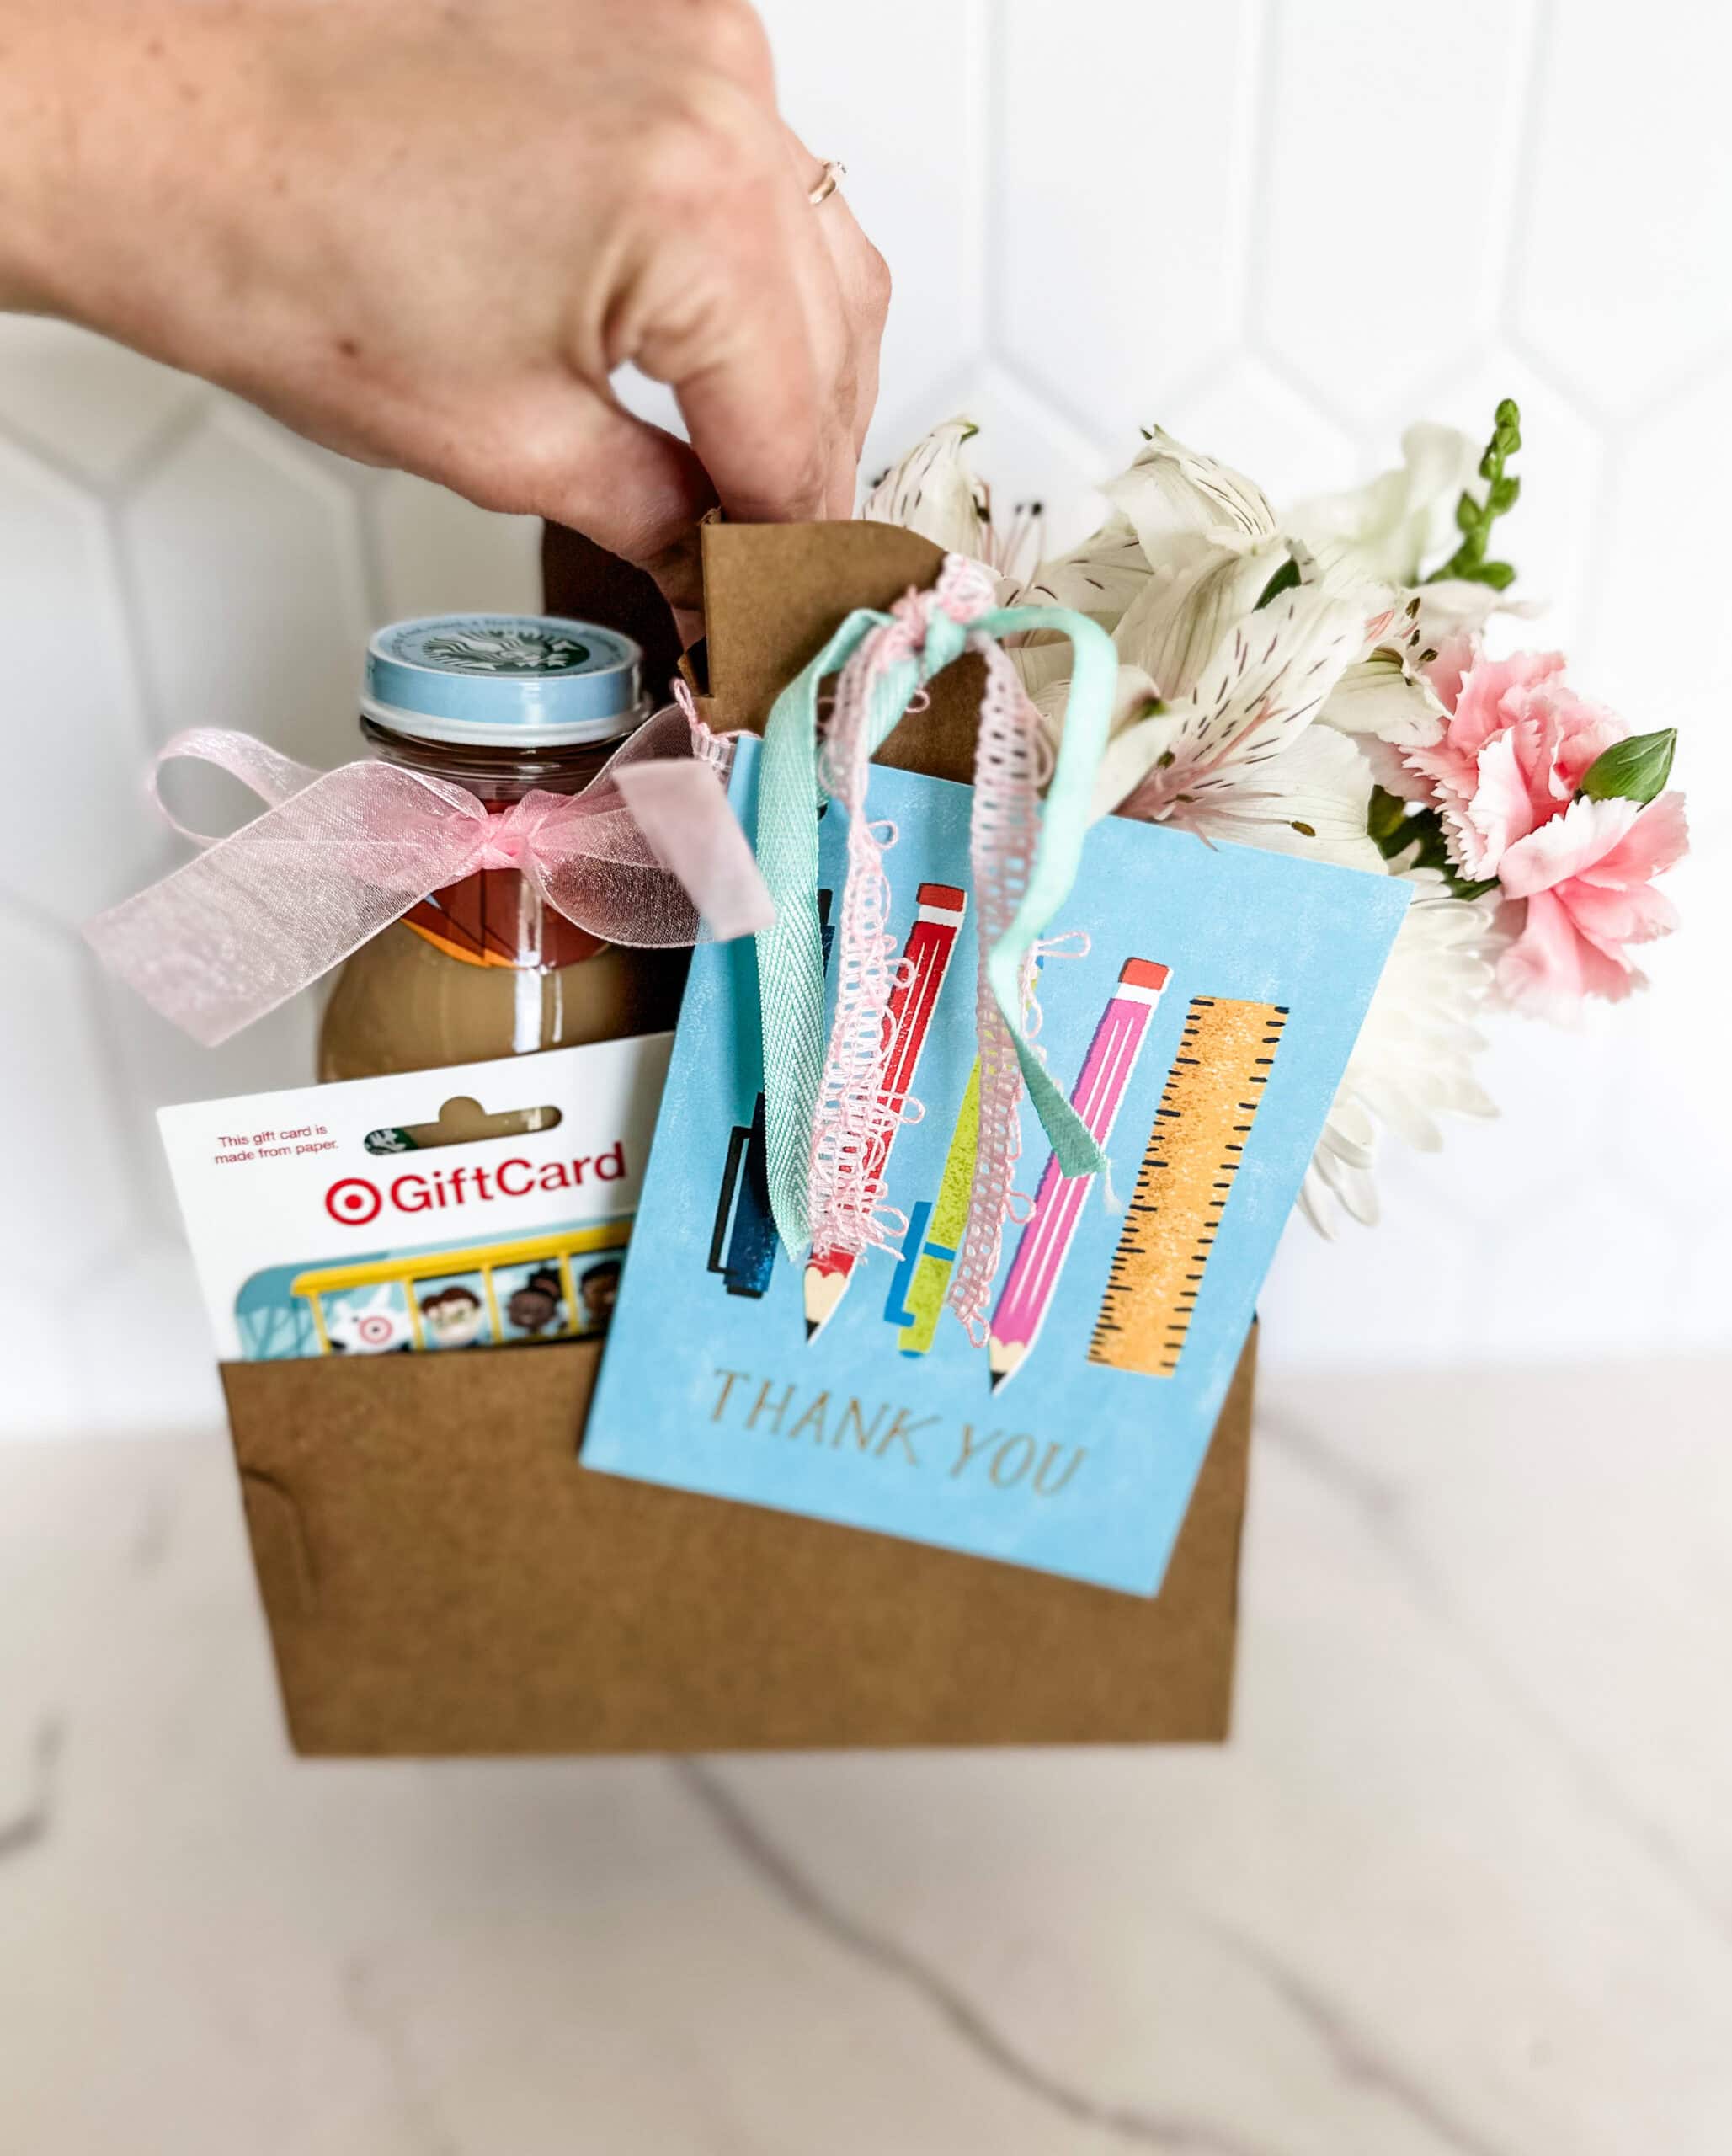
3. Fill your small vase or mason jar with water — but be careful not to overfill! You want just enough water to keep the flowers fresh, without risking any spills. Nestle your jar of flowers into one side of the cup holder, making sure it sits firmly on the shred.
4. On the opposite side of the flowers, place your bottled coffee (or fun beverage). I love adding a bow around the neck of the bottle — it makes it feel extra festive and polished.

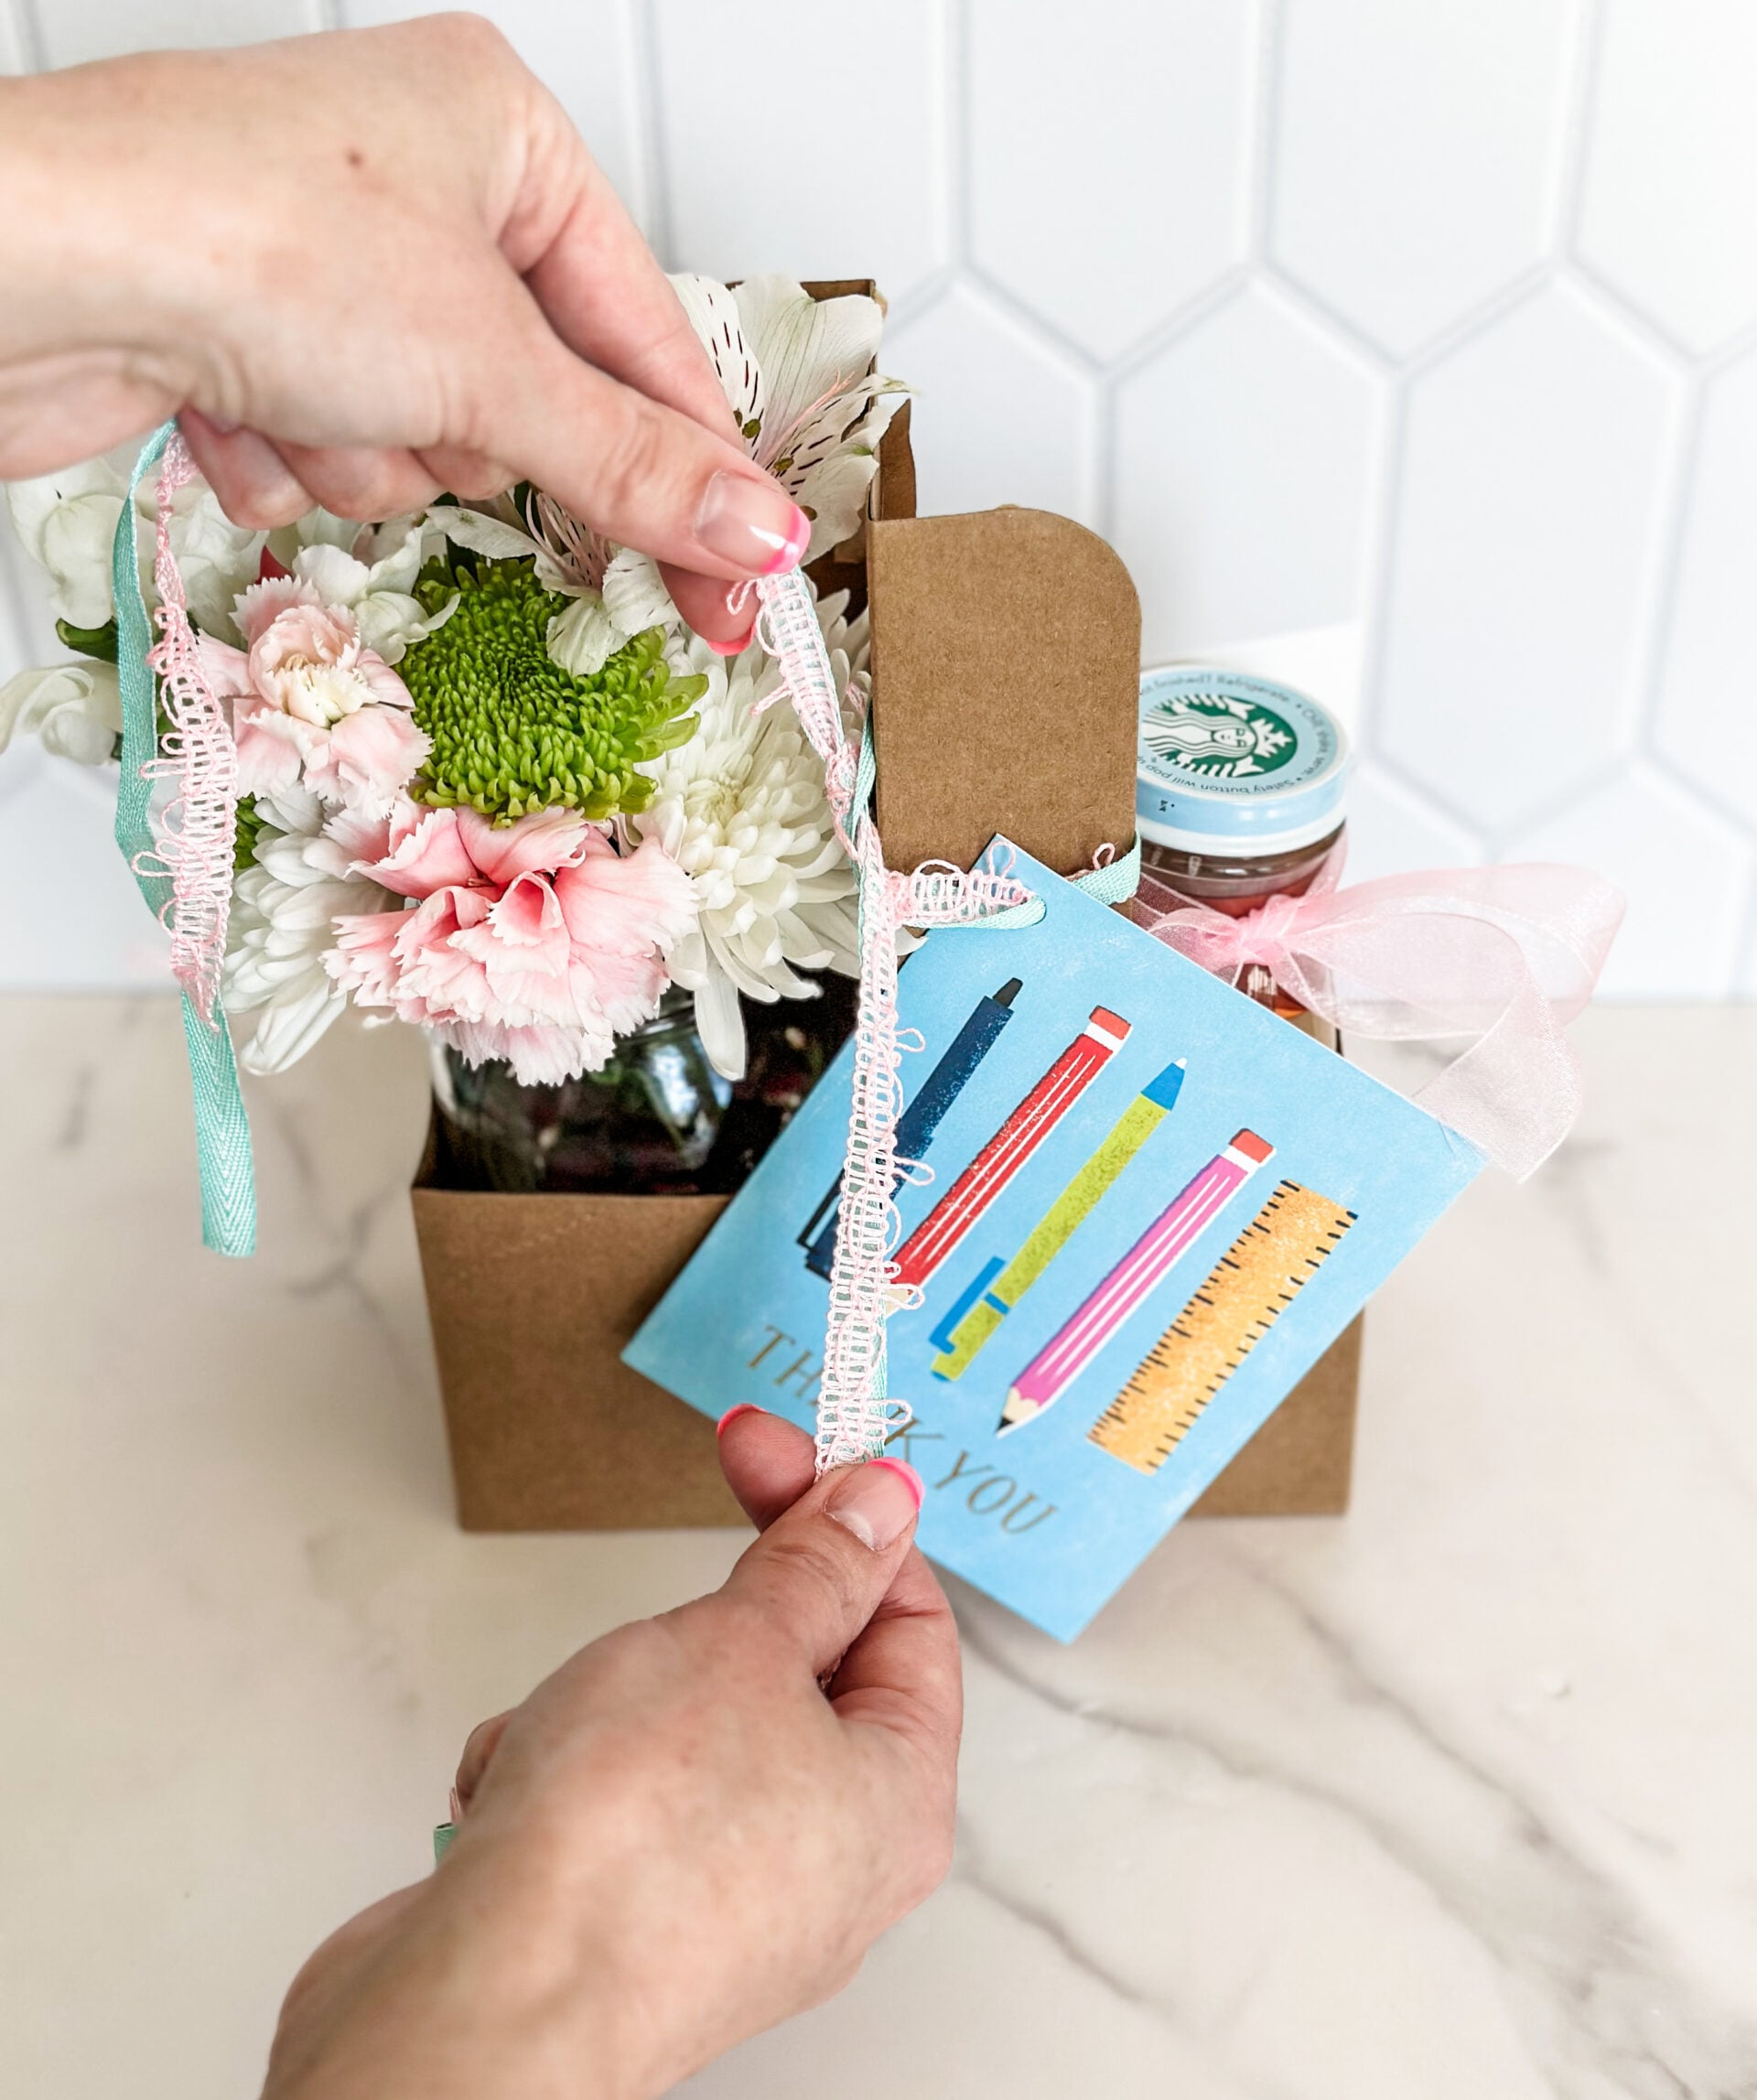
5. Tuck a gift card into the basket — I chose Target gift cards, but coffee shop cards are a great choice. A little added treat goes a long way! (If a gift card isn’t in the budget, you can absolutely skip this part.)
6. Write a thoughtful thank you note. Then, hole punch one corner of the card or tag, thread some ribbon through, and tie it onto the handle of the cup holder.
7. Customize and Decorate! Want to take your cup holder gift up a notch? Personalize the sides! Use a paint pen to write the teacher’s or recipient’s name. Let your child add their own doodles, drawings, or stickers.
And that’s it — you’ve created a unique, gorgeous gift in just a few easy steps!
Pro Tip: Before gifting, double-check that everything is stable and securely nestled. If you’re transporting several of these gifts, a shallow box or tray can help keep them upright in the car.
This makes the perfect gift because it is affordable, customizable, kid-friendly, and so thoughtful and easy! Whether you’re celebrating a hardworking teacher, a wonderful mom, or just surprising a friend, this DIY Cup Holder Gift Basket is sure to bring a smile.


Leave a Reply